Extended time tracking
When your organization admins switch on the extended module, Timesheet in the sidebar becomes Time tracking. Everything about your hours then lives on one page. The basics stay as described in Tracking your time.
The views
At the top of Time tracking you switch between pills:
- List: your entries by day.
- Calendar: a week or a month with your entries as blocks.
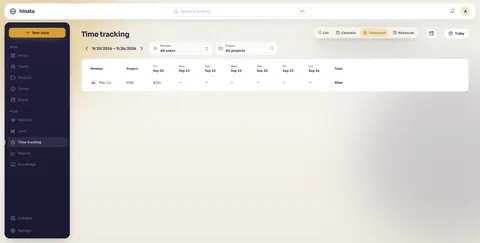
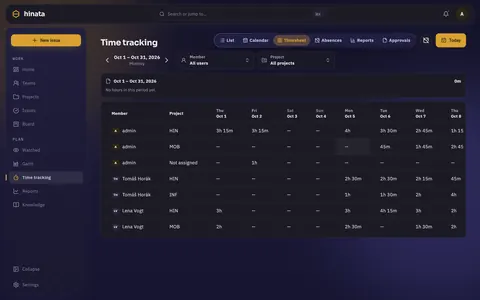
- Timesheet: the grid of days and projects.
- Absences: leave and sickness, see Absences.
- Reports: totals, exports and billing.
- Approvals: only when timesheet approvals are on.
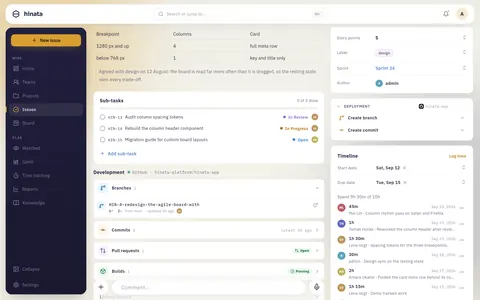
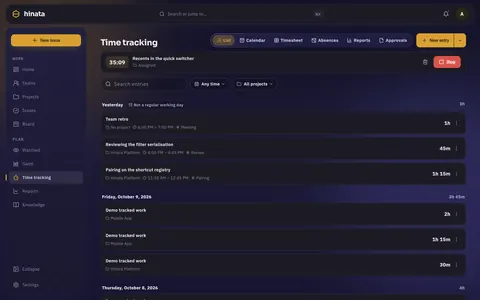
New entry opens the entry editor. In it you either type a duration or a start and an end. You add a description, place the entry on a project or an issue and pick tags. Log time on an issue opens the same editor, already placed on that issue.
The timer
The timer bar sits at the top of the time tracking page. Start runs a stopwatch. The arrow beside it opens Choose how it counts:
- Stopwatch: counts up until you stop.
- Countdown: counts down from 25 minutes by default (1 to 1440 minutes) and stops by itself at zero.
- Pomodoro: 25 minutes of work, 5 minutes break, a long break of 15 minutes after four rounds. The phase does not change on its own. You press Take a break and Back to work. Every work interval becomes its own entry. Breaks are never recorded.
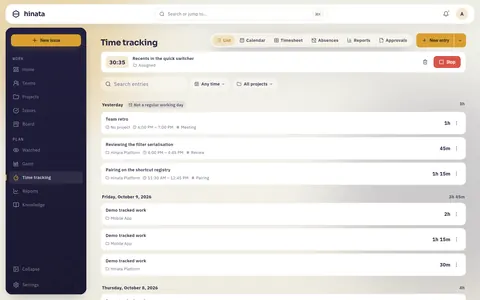
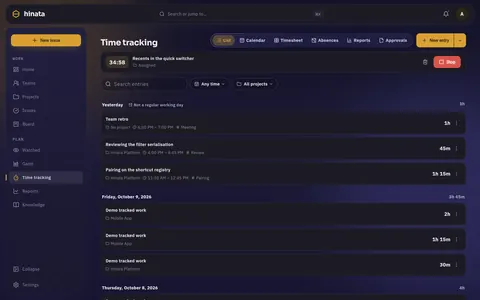
Stop turns the timer into an entry. If your organization requires fields, such as a tag or an issue, the editor opens first. Cancel it and the timer keeps running. Discard timer throws it away without an entry. A timer that runs for 24 hours is cut off there.
You set your own lengths and the sound at the end of an interval under Settings → Time tracking.
Timer outside the app
The app can show the timer outside its window. The card Timer outside the app asks once, and nothing is on until you confirm it:
- a notification when a countdown or Pomodoro interval ends,
- on Android, a quiet notification, the home screen widget and a Quick Settings tile while the timer runs,
- on iPhone and iPad, a Live Activity on the lock screen and in the Dynamic Island, and the timer widget on the home and lock screen,
- on the web, a browser notification when the tab is in the background, the running time in the tab title, and a mark on the app icon for the installed web app,
- on the desktop, the running timer in the menu bar or the tray, described below, and on a Mac the timer widget on the desktop and in Notification Center.
The texts are generic and never name the issue. Your switches stay on this device and are not sent to the server.
The Live Activity and the widgets show the time and whether you work or take a break. The description only appears with Details on the lock screen switched on. Add the widget like any other: on iOS from the widget gallery of the home or lock screen, on Android from the launcher's widget list. A tap on it opens focus mode. If Live Activities are switched off for Hinata in the system settings, the settings say so, and the widgets keep working.
Without opening the app. Stop and Take a break or Resume in the notification, the buttons on the widget and, on Android, the Quick Settings tile act right away while the app stays closed. On iPhone and iPad (iOS 17 and later) the widget starts a stopwatch with its button when no timer runs, and the Live Activity has a stop button of its own, in a Pomodoro also the next phase: in the expanded Dynamic Island, on the lock screen and in Notification Center. A tap on the tile stops the timer, or turns the phase in a Pomodoro. A long press, or a tap with no timer running, opens focus mode. On a locked device you unlock first. Hinata offers the tile once, after your first timer; you can also add it yourself when you edit the Quick Settings.
Live Update (Android 16 and later). The running timer's notification becomes a Live Update: a chip in the status bar that counts the time, an entry at the top of the notification shade, and on phones that show them, the lock screen, the always-on display and Samsung's Now Bar. The chip shows only the time, the same for work and a break. A Pomodoro shows its set as one bar, one segment per interval and break; on Android 17 a countdown or a stopwatch shows its time as a large figure. The switch Live Update in the status bar under Settings → Time tracking is on with the running notification. If Live Updates are switched off for Hinata in the system settings, the settings say so and open the right page, and the ongoing notification stays as it was. Whether a phone shows Live Updates for every app is the manufacturer's choice; on Samsung phones look for Live notifications for all apps. If you swipe the notification away, Hinata leaves it gone until the timer changes phase or you start a new one.
Reliability mode (Android). Some manufacturers' battery managers end the ongoing notification after a while. Switch on Reliability mode and a foreground service holds the very same notification while the timer runs. It starts only while the app is open, ends with the timer, when you sign out or switch it off, and collects nothing. It is off by default.
Update in the background (iPhone and iPad). By default only the open app changes the Live Activity. Switch on Update in the background under Settings → Time tracking, and a phase change or a stop on another device reaches the lock screen while the app is closed. Your server sends them end-to-end encrypted through Hinata Connect, Google and Apple, who only see when something is sent. The switch applies from the next Live Activity. What exactly is sent is on the privacy page.
Ring as an alarm (iPhone and iPad with iOS 26 and later). Under Settings → Time tracking, below Interval end, is the switch Ring as an alarm. With it on, a countdown or a Pomodoro interval ends like an alarm clock: it rings in silent mode, during a Focus and with the app closed, and on a paired Apple Watch. It takes the place of the notification at the end of the interval. Until then the system's countdown runs on the lock screen and in the Dynamic Island, with stop and, in a Pomodoro, the next phase; the stopwatch keeps its Live Activity. The ringing alarm offers Stop and, in a Pomodoro, Take a break or Resume; both act like the button in the app, also while the app is closed. The first time you switch it on, iOS asks whether Hinata may set alarms. With the app in front, the note in the app says it and the alarm stays quiet. If the system takes no more alarms, the end of the interval comes as a notification again, and the app says so once. Signing out and Delete now remove every alarm.
Siri, Shortcuts and controls (iPhone and iPad). Hinata comes with five shortcuts: Start timer, Stop timer, Next phase, Timer status and Open focus. You find them in the Shortcuts app under Hinata and in the search on the Home Screen. Siri understands, for example, “Start a timer in Hinata”, “Stop the Hinata timer” or “How long is my Hinata timer running”. The first time, Siri asks whether to turn on the Hinata shortcuts. Start timer starts a stopwatch, with a description and one of your projects if you like; for your projects the shortcut is also ready with the project filled in. If a timer is already running, it does not start a second one. From iOS 18 you can put three controls in Control Center, on the lock screen or on the Action button: Timer (on starts a stopwatch, off stops it), Next phase and Focus. Starting, stopping and the phase change work without the app opening, and the Live Activity appears or ends with them. On a locked device iOS asks for Face ID or the passcode first. Timer status and the Timer control know the timer from the same record as the widget, so only while Live Activity and widgets is on; Siri never says the description. The shortcuts need iOS 17, the controls iOS 18.
On the desktop
Menu bar and tray. On a Mac the menu bar shows the running time next to the Hinata icon. On Windows and Linux an icon in the notification area shows that the timer runs, and on Windows its tooltip has the time. Work and breaks look the same, so a shared screen does not tell anyone when you take a break: during a Pomodoro the menu bar, the tooltip and the taskbar show that the timer runs, but no time, because the time left of an interval would give a break away. Click the icon for a menu: start or stop, the next Pomodoro interval, the focus view, the window, and quit. Only the open menu says whether you are in a focus or a break interval, and it names what you work on only if you switch on Description in the menu (not on Linux, see below).
Widgets on a Mac (macOS 14 and later). The timer widget comes to the Mac in small and medium, for the desktop and Notification Center. It is in the widget gallery once Hinata has started once: right-click the desktop, Edit Widgets, search for Hinata. As on the iPhone it shows only the time and whether you work or take a break, never the description, and it ticks without the app. A click opens the focus view. On a Mac it has no buttons. The switch Menu bar and widgets under Settings → Time tracking covers both. iPhone widgets can go on the Mac too (gallery, From iPhone); they show the iPhone's timer.
Keep running when closed. Closing the window leaves a running timer in the menu bar or the tray, and the window comes back from the menu (or, on a Mac, from the Dock). On a Mac this is on by default and ⌘Q still quits. On Windows and Linux it is off until you switch it on.
Taskbar (Windows). The taskbar button fills up with the progress of a countdown, carries a small mark while the timer runs, and its preview has two buttons: start or stop, and the focus view.
System-wide shortcuts. Off by default, and only there while the menu bar or tray icon is on, so a press never starts a timer you cannot see. Switch on System-wide shortcuts under Settings → Time tracking to start or stop the timer and open the focus view from any app:
| Shortcut | Mac | Windows |
|---|---|---|
| Start or stop | ⌃⌥⌘S | Ctrl+Alt+Shift+S |
| Focus view | ⌃⌥⌘F | Ctrl+Alt+Shift+F |
Choose other combinations by clicking one and pressing the new keys. A combination needs Control or Command (on Windows Ctrl or the Windows key), because Shift and Option alone type characters in every app; on Windows, Ctrl+Alt alone is AltGr and is refused for the same reason. If another app or the system already uses a combination, the settings say so. On a Mac another app's shortcut cannot always be seen, so Check now asks you to press one of them once, with any app in front, and tells you whether the press arrived; nothing starts or stops during that check.
The shortcuts go through the operating system's registration for shortcuts. The app hears its two combinations and no other key, and asks for no accessibility permission.
Linux. The tray icon needs a panel that shows tray icons: KDE Plasma and most desktops do, GNOME does with the AppIndicator extension (Ubuntu has it on). Without one nothing shows, and the window does not hide into a tray you cannot see. The tray menu on Linux never names what you work on, because any program of the session can read it.
System-wide shortcuts on Linux. Here your desktop decides which keys trigger them. Hinata suggests the same combinations as on Windows. GNOME (version 48 and later) and KDE Plasma 6 ask once, the first time you switch them on, which shortcuts to allow. Until you confirm there, the shortcuts have no keys yet, and the settings say so. The settings then show the keys the desktop reported, and Configure in the system opens its shortcut settings, where you change them. If you turned the dialog down, the same button asks again. Sway and other wlroots desktops offer no system-wide shortcuts and show “not available”. The AppImage needs its desktop integration (for example through Gear Lever or AppImageLauncher) so the desktop knows which app is asking. The Snap needs nothing connected by hand for this. On Linux too, the app hears these two shortcuts and no other key.
Focus mode and shortcuts
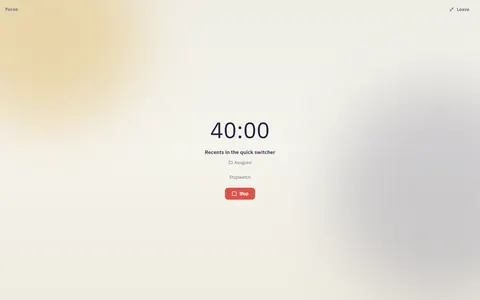
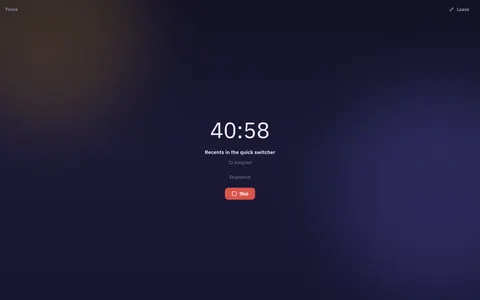
Focus mode shows only the running timer and what you are working on. Open it with ⇧⌘F (on Windows and Linux Ctrl+Shift+F). Esc leaves it.
| Shortcut | Action |
|---|---|
| ⇧⌘S | Start or stop the timer |
| ⇧⌘E | Log time |
| ⇧⌘F | Focus mode |
On Windows and Linux use Ctrl instead of ⌘. The ⌘K palette also has commands for time tracking, the timesheet, absences and Ask for time off.
The calendar
Calendar shows a Week or a Month. In the week you draw a block in 15 minute steps to create an entry, and drag a block to move it. A long press or a right click on a day opens the day menu, for example to request an absence for that day.
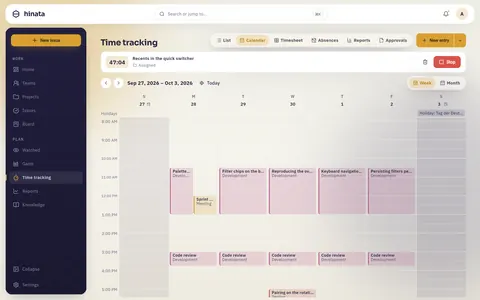
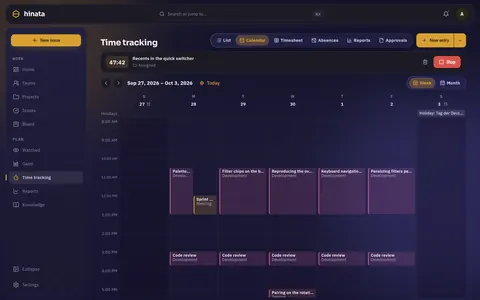
Holidays, absences and days without planned hours are marked lightly. That is no lock. A day that really cannot be changed shows a padlock.
The timesheet
The timesheet here is the same grid as in the basic mode, with more on it:
- In your own row you tap a cell to add or correct time for that day and project.
- Your capacity puts your planned hours, less holidays and absences, next to what you booked. Only you see it.
- With approvals on, the grid follows your approval period and shows its status above it.
Tags
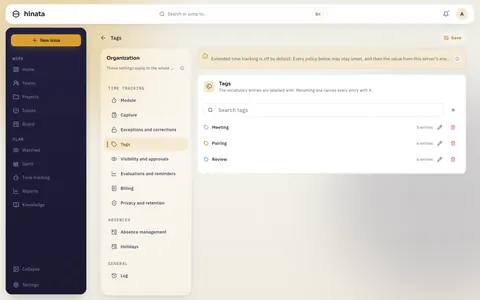
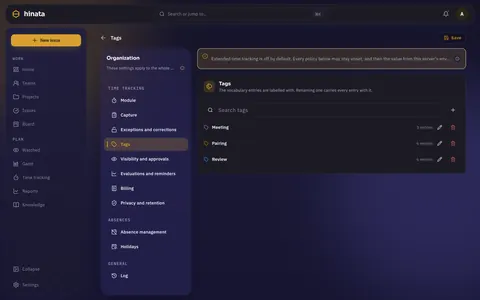
Tags sort your time, for example by client or kind of work. You pick them in the entry editor.
- Everybody can create a tag, unless your organization limits that to organization admins.
- Only organization admins rename or delete tags.
- A name is unique regardless of case and has at most 40 characters.
- Your organization can make a tag required. The editor then tells you before it saves.
History of an entry
History of this entry in the editor shows what other people changed on your entry, with who and when. Your own edits are not listed.
Locked days and corrections
Some days cannot be changed any more. The editor and the list then show a chip with the reason, who can lift it and what you can do:
- Lock date: your organization closed everything before a date.
- Submitted period: the period was handed in or approved.
- Invoice: the entry is on an issued invoice.
- Too far back: the day is older than your organization allows.
What you can do:
- Request a correction asks the people who can lift the lock to change an entry for you.
- Ask for older days asks to open days that are too far back. An organization admin can open them for you, and they close again by themselves after 14 days.
Your open requests are under Settings → Time tracking → Corrections and older days.
Timesheet approvals
If your organization uses approvals, you hand in your timesheet for each period. The period can be weekly, every two weeks, twice a month, monthly (the default), quarterly or set by the organization.
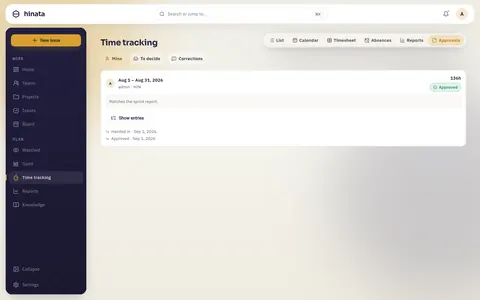
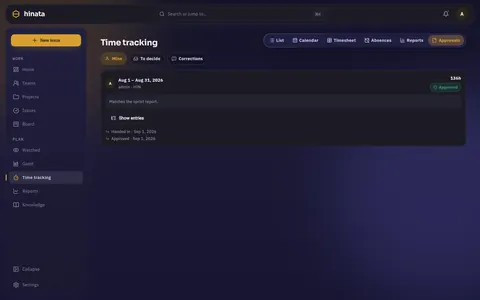
- Hand in period works once the period is over. A period can be at most 92 days.
- Withdraw takes it back while nobody has decided.
- Project leads and organization admins Approve it or Send back with a reason.
- An approved period can be Reopened, again with a reason.
- Nobody approves their own timesheet.
Handed in and approved days are locked for edits. Approvals has three tabs: Mine, To decide and Corrections.
Targets, reminders and hints
If your organization admins allow it, you set a Daily target and a Weekly target under Settings → Time tracking → Reminders. Hinata reminds you when time is missing, on your working days and at the time you pick. Nobody else learns whether or when you were reminded.
Working-time hints point out things like more than 10 hours on a day, a short rest between two days, work on a Sunday or a holiday, or an entry recorded late. Only you see them, and they block nothing.
Calendar subscriptions
If your organization admins switched on calendar import, you can subscribe to your own calendars from Google, Outlook or Apple. Hinata only reads them and never writes back. Only you see your subscriptions.
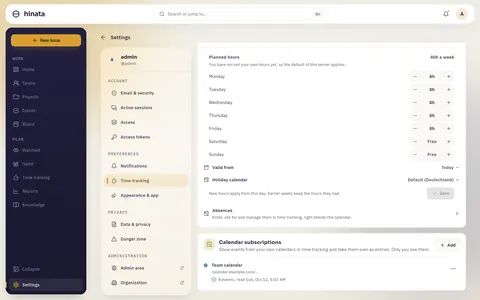
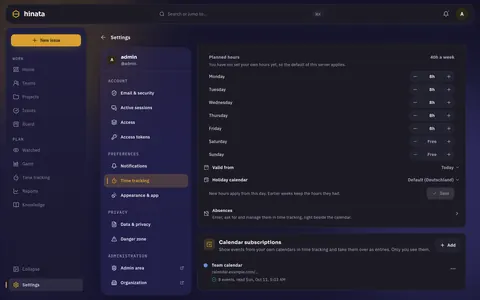
- Open Settings → Time tracking → Calendar subscriptions and tap Add.
- Enter a name, paste the private ICS address (
https://orwebcal://) and pick a colour. - Tap Subscribe.
- Up to 10 calendars. Each is read every 30 minutes, and you can refresh one once a minute.
- After five failed reads in a row a calendar is paused until you resume it.
- Events show with a dashed outline in the calendar, from 30 days back to 90 days ahead. They count towards no total.
- Tap an event to take it over as an entry. An event becomes one entry at most. All-day events cannot be taken over.
- Take over ended events automatically does it for you, with a project and tags you choose.
The address is a key
Whoever knows the address can read the calendar. Hinata stores it encrypted and never shows it again.
Shared entries
When several of you worked together, one person logs it and shares it.
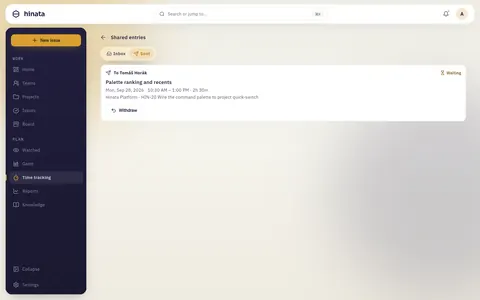
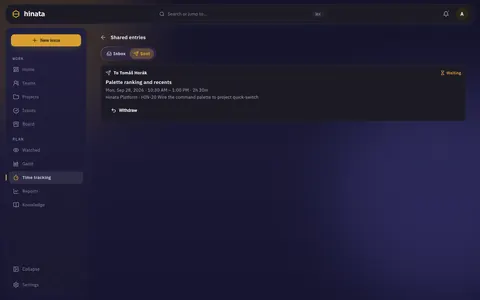
- Open your entry and tap Share with…. Or type + in the description to pick people of the project.
- Choose up to 20 people and tap Send invitations.
The others find the invitation under Shared entries → Inbox:
- Accept adds a copy to their own entries.
- Adjust accepts it with another project or other tags.
- Decline says no. You only see that it was declined, never why.
The copy then belongs to that person. Their lock dates and approvals apply to it. Under Sent you follow your invitations and can withdraw open ones.
Reports, export and import
Reports has eight tabs: Project and Budgets (see Reports & dashboard), then Summary, Entries, Workload, Absences, Billing and Saved. You pick a period, filters and a grouping by project, person, team, activity, tag, issue, day, week or month.
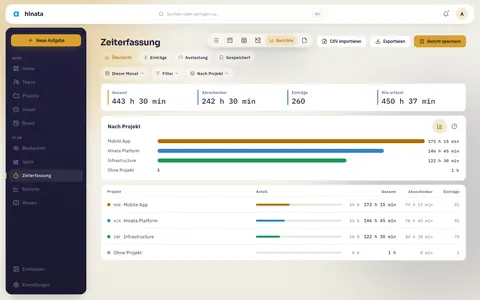
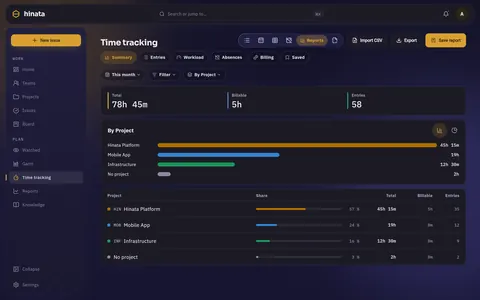
- A report only counts what you may see anyway. Other people's names show only where a policy allows it. See Time tracking: privacy & law.
- Workload compares capacity and booked time per person. It exists only when your organization switched it on, and only for leads and organization admins.
- Export gives PDF (up to 5,000 rows), Excel (up to 50,000) or CSV (up to 100,000), or you print it. Every export goes into the audit log.
- Import CSV brings in your own entries from a file of up to 5 MB and 10,000 rows. Exports from Hinata and toggl are recognised. Every row is checked like a typed entry, and either all valid rows are written or none.
- Save report keeps up to 200 reports. A saved report can get a share link (only signed-in people, each sees their own scope) or go out by mail every week or month to up to 50 people, as a link without attachment.
Budgets
A project can have a time budget. Project leads set it under Project settings → Time tracking, in hours: 120 is 120 hours, 7.5 is seven and a half. What has been used shows as a honey level wherever it matters:
- in the project settings as a tube for the budget and one for the sum of estimates,
- on every project card and in the head of a board with exactly one project as a capsule with a percentage,
- on the dashboard in the Budgets tile as a honeycomb of the three fullest budgets,
- in an issue as a tube for its estimate, and on Gantt as a honey line along the foot of each bar,
- in the timer bar for the running issue, on a phone only from the warning share.
For the budget and for estimates the lead picks a mode each:
- Note while recording (the default): whoever records time sees in the form and in the timesheet cell, from the warning share, how much is left, with the new entry already counted. After saving, a note says where the project stands now. The leads and the admins of the project's teams hear at once at the warning share, at 100 % and again at 110, 125 and 150 %.
- Hourly alert only: no note in the form. Leads hear once an hour, as before.
Recording is never blocked in either mode. Working time must always be recordable. Whether leads are notified is decided by the organization's Budget alerts policy. With it off, the project's settings page says so.
History and forecast
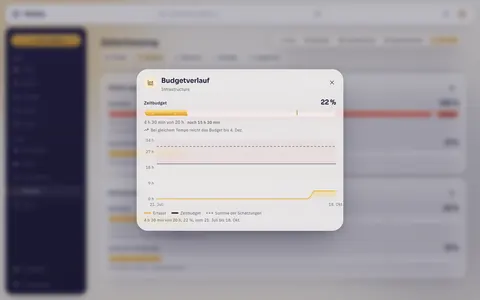
A tap on a cell in the dashboard's honeycomb, or on History in the project settings, opens the budget's history. The honey area shows how the recorded hours added up day by day, the line above it the budget and, if there is one, the sum of estimates.
Under the tube sits a forecast such as "Lasts until about 14 November". Hinata uses the pace of the last 14 days per working day. Weekends and the holidays of the default calendar do not count. With fewer than three days of entries, the forecast says it is uncertain. When the budget is already used up or work has stopped, it says exactly that.
Budget per sprint
On a Scrum board every sprint can have its own time budget. Whoever may manage the board sets it through the capsule in the sprint row. It counts the time on the sprint's issues during its run. The note while recording and the alerts to leads follow the same rules as the project budget.
Money budget
With billing switched on, a project can also have a money budget. Hinata values every entry at the rate that applies to it and shows the amount as a third tube. There are two kinds:
- Revenue: valued at the billable rates. The project's lead sets it and sees it.
- Cost: valued at the cost rates. Only organization admins who also manage the project set and see it.
A revenue budget counts billable entries only. Whether a new entry is billable is decided by Billable by default in the project settings, and otherwise by the instance default. The timer follows the same rule. The Billable switch in an entry's form changes it, also afterwards. Hinata names the hours that do not count under the money budget: entries that are not billable, and entries on a day no rate applied to yet.
Members never see the money budget, not even in the form while recording. Alerts about the money budget go to leads only, and only for revenue.
Every budget you can see is listed under Reports → Budgets, fullest first. See Reports & dashboard.
Billing
With billing switched on, project leads and organization admins price recorded time.
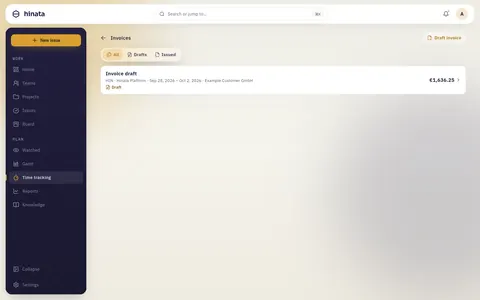
- Rates: a revenue rate for billable entries, set by project leads, and a cost rate that only organization admins see. The most specific rate wins: issue, project member, person, project, team, default. A rate changes from a date.
- Reports in the Billing tab: Billing, Profitability (organization admins only, never per person) and Utilization.
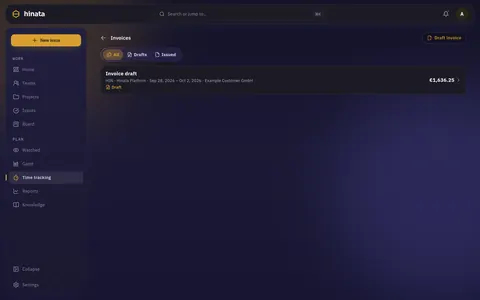
- Invoices: Draft invoice for a project and up to 92 days and 5,000 entries. Issue gives it the next number without gaps, for example
INV-2026-00001, and locks its entries. Write credit note reverses an issued invoice once and frees its entries again. Invoices come as PDF, Word and Excel.
Issued invoices and credit notes are never deleted.
Time tracking through MCP
An AI client connected through MCP can log, list, change and delete your own entries, read your timesheet and summaries, and start, stop or discard your timer. It always acts with your rights and never reads anybody else's time.
Next steps
- Leave and sickness: Absences: leave and sickness.
- For admins: switching it on and setting the rules.
- Who sees what: Time tracking: privacy & law.