Getting started#
Hinata is where your team's work lives. Every task, bug, question and idea becomes an issue; issues sit inside projects; and projects move across boards, timelines and reports until the work is done.
Somebody in your organization runs the Hinata server, and you have been given an account and an app. This page takes you from a freshly installed app to a workspace you can find your way around — and most of it you only ever do once.
The words you'll need#
Hinata borrows its vocabulary from agile project management. If some of it is new, this is the whole list, and you can come back to it:
| Word | What it means here |
|---|---|
| Issue | One piece of work: a task, a bug, a feature, a question. Everything you do is an issue. |
| Project | The container issues live in — one product, one service, one initiative. |
| Issue key | The short id every issue gets from its project, like HIN-42. Say it out loud, paste it in chat. |
| Team | A group of people, and the projects that group can open. |
| Board | The column view of a project's work — you drag cards across it. |
| Workflow state | The columns themselves: Backlog, In Progress, Done, whatever your project uses. |
| Sprint | A fixed stretch of time — usually two weeks — with a chosen set of issues in it. |
| Backlog | Everything that is not in a sprint yet. |
| Label | A colored tag you can put on an issue, like design or security. |
| Epic | A big piece of work that other issues belong to. |
None of these need to be understood today. You will absorb them by using them.
Before you start#
Three things get you in:
- The address of your server. Hinata is self-hosted, so this is specific to your organization. Ask whoever set it up; it will look like
https://track.example.org. - An account on it. Usually an invitation e-mail. On some servers you can create your own.
- The app. Android, iPhone and iPad, macOS, Windows, Linux — or just a browser. The Download page has all of them.
The app is the same everywhere. Nothing on this page is desktop-only unless it says so.
Connect to your server#
There is no single address everyone signs into. Every organization runs its own Hinata server, so the app has to be told which one is yours before it can show you anything at all.
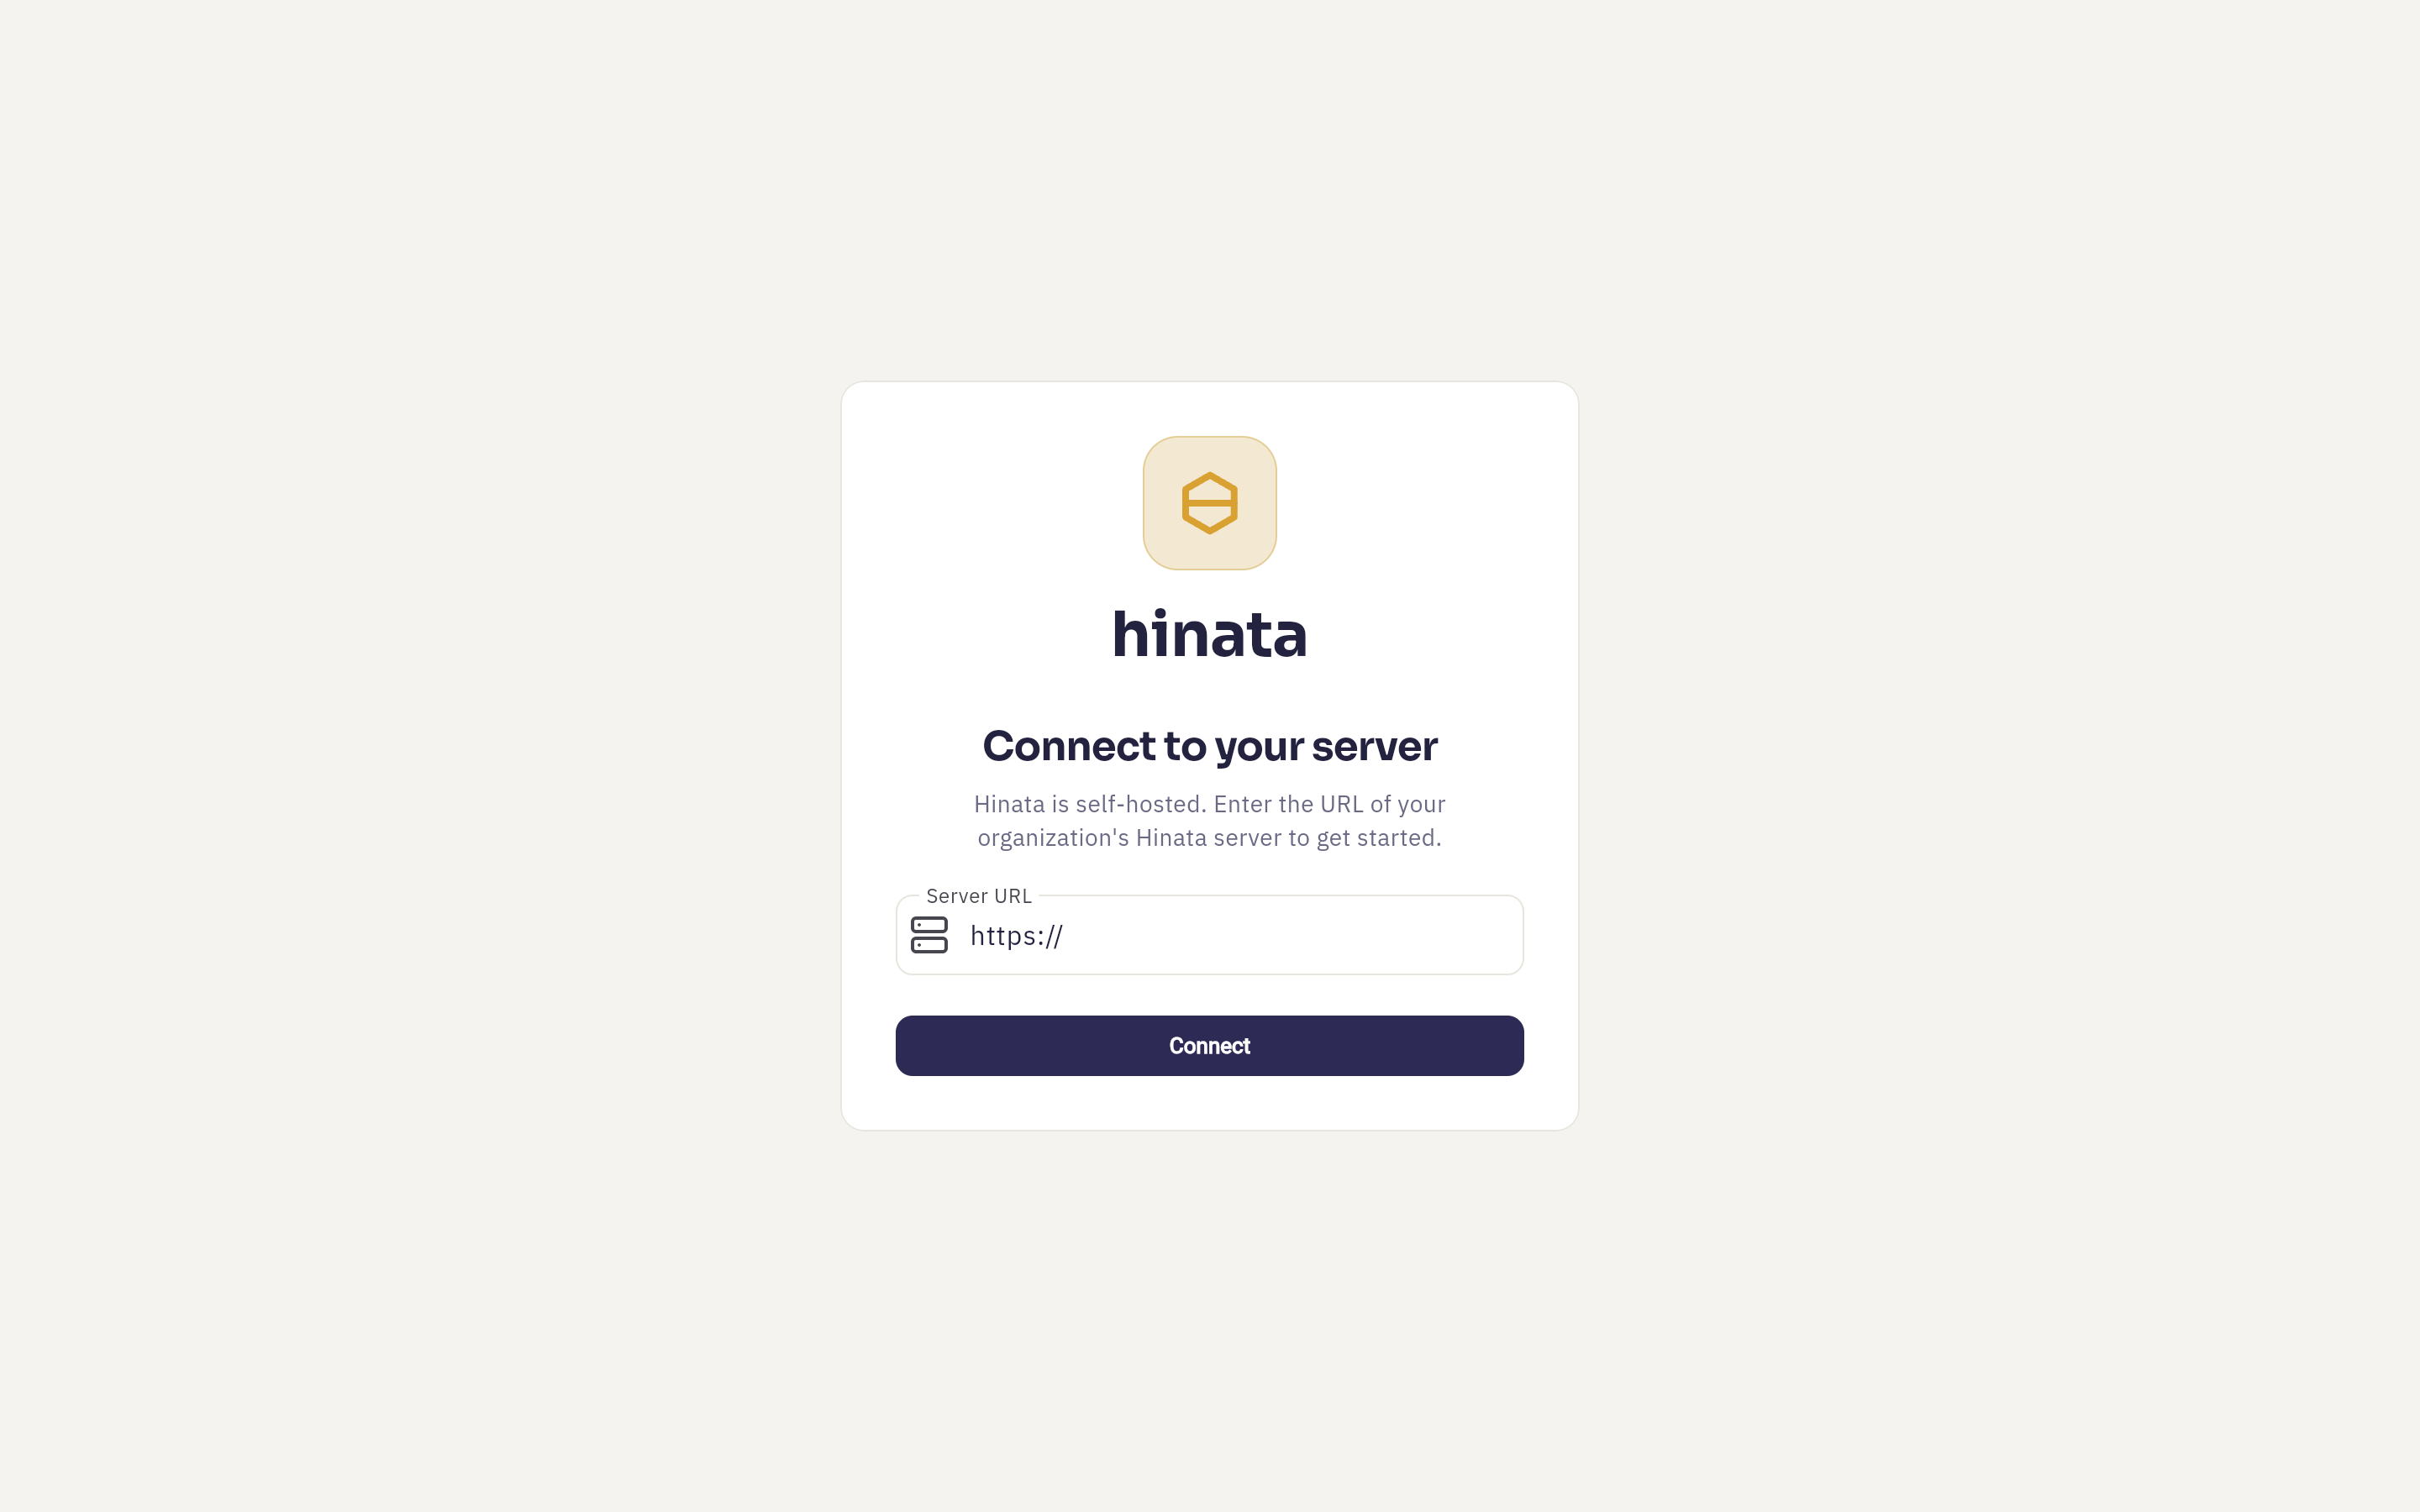 The very first screen after installing: the hinata wordmark, one Server URL field pre-filled with https://, and the Connect button. There is nothing else on it — no account to pick, nothing to skip.
The app asks that address who it is, and only moves on once the server answers and identifies itself as a Hinata server. Until then you stay exactly where you are.
This is deliberate. An app that guessed, or quietly fell back to some default, would be an app that could send your organization's work somewhere it doesn't belong. Hinata would rather stop and ask.
If the connection fails#
You'll see "Could not connect to this server. Please verify the URL." Work down this list before asking for help:
- Check the spelling, including
https://. A missingsis the single most common cause. - Check you're on the right network. Many organizations keep Hinata behind a VPN or inside the office network. From a café it is simply not reachable, and the app cannot tell the difference between that and a wrong address.
- Check whether the address needs a port, such as
https://track.example.org:3356. Whoever runs the server will know. - Ask whether the server is up. Sometimes the honest answer is "not right now".
You cannot skip this step
The published apps ship with no server built in — not the App Store build, not the Play Store build, not the desktop ones. That is what makes it your app pointing at your server. The one exception is the browser: if your organization hosts the web version itself, the address can be filled in for you, and you may never see this screen.
Working with more than one server#
Hinata remembers every server you've connected to, and keeps each one's sign-in separate. That matters if you work with a client who runs their own Hinata, or if your company keeps a test server alongside the real one. Saved servers appear underneath the connect form, so you can jump between them before signing in — and from inside the app, Settings → Manage servers shows the same list.
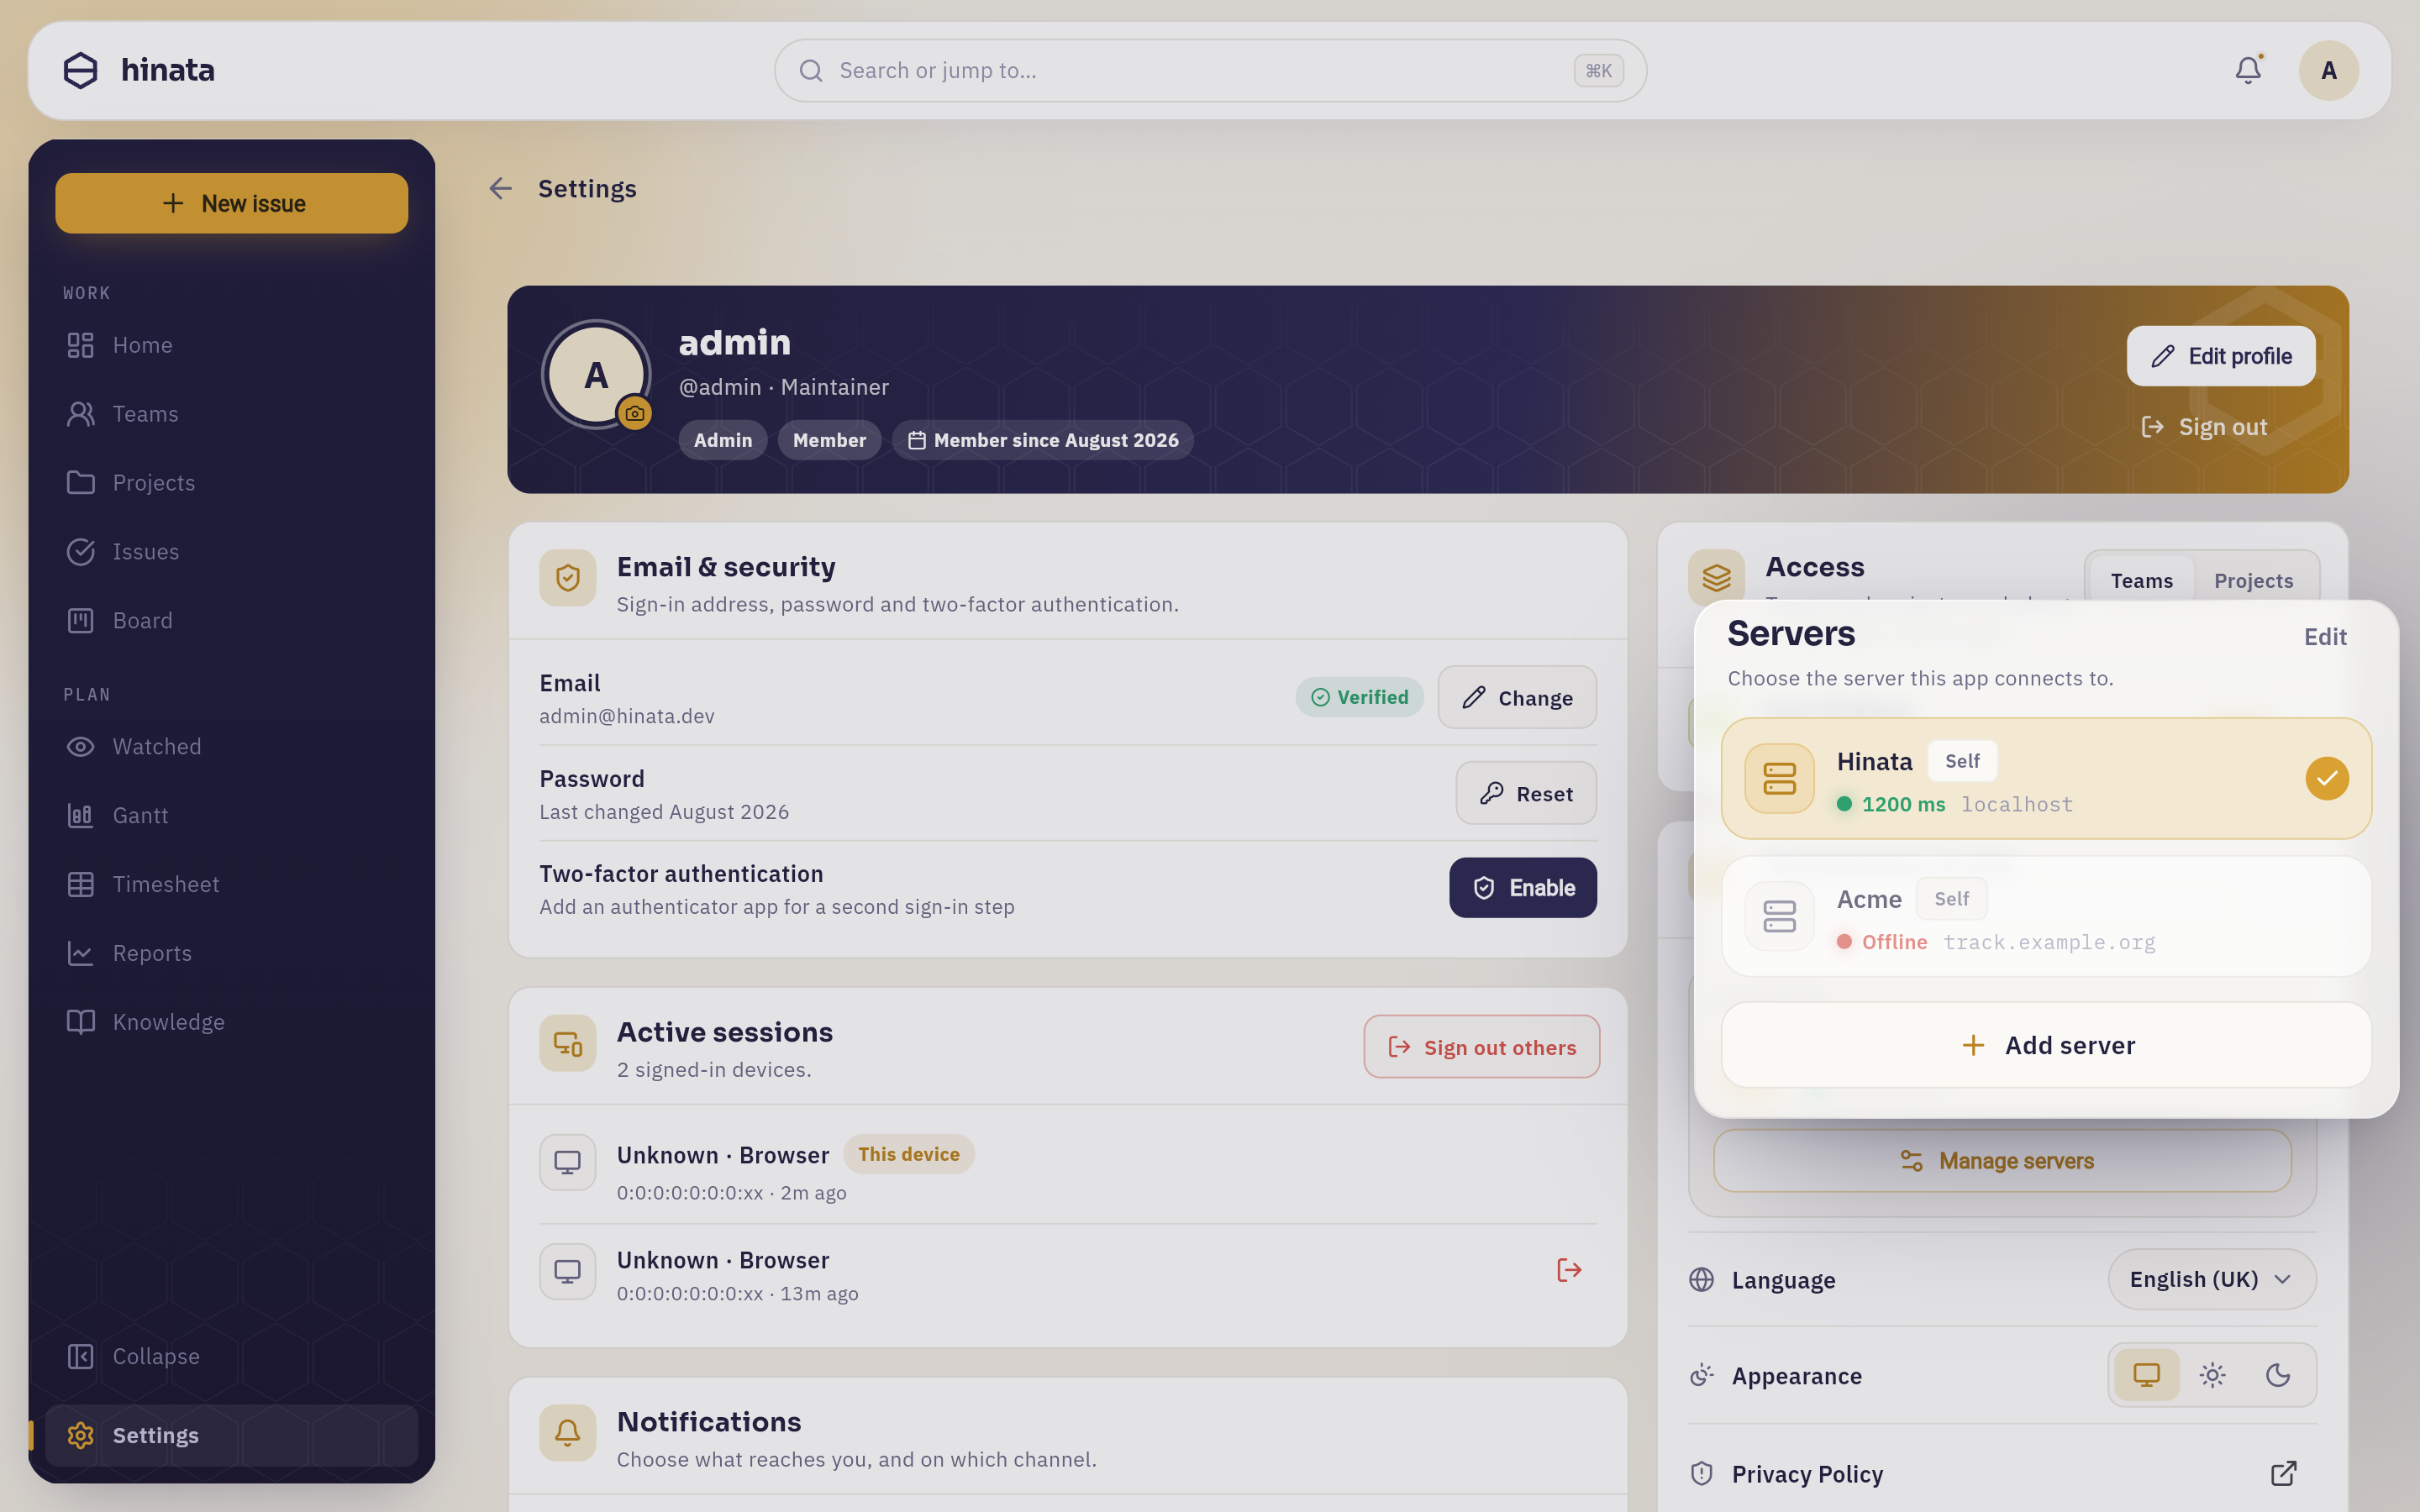 Manage servers: one row per saved server with a Self or Cloud badge, a green dot and the answer time in milliseconds when it is reachable, a red Offline when it is not. The tick marks the server this app is currently connected to; Add server sits at the foot of the sheet.
The reachability check runs while the sheet is open, so an offline row means the server, not the app.
Forgetting a server clears its sign-in
Removing a server from the list also deletes the saved credentials for it on that device. Your account on the server is untouched — you'll just have to sign in again next time.
Sign in#
Once the server answers, you get its sign-in screen. What you find there depends on how your administrator set the server up, so not every option below will be on yours.
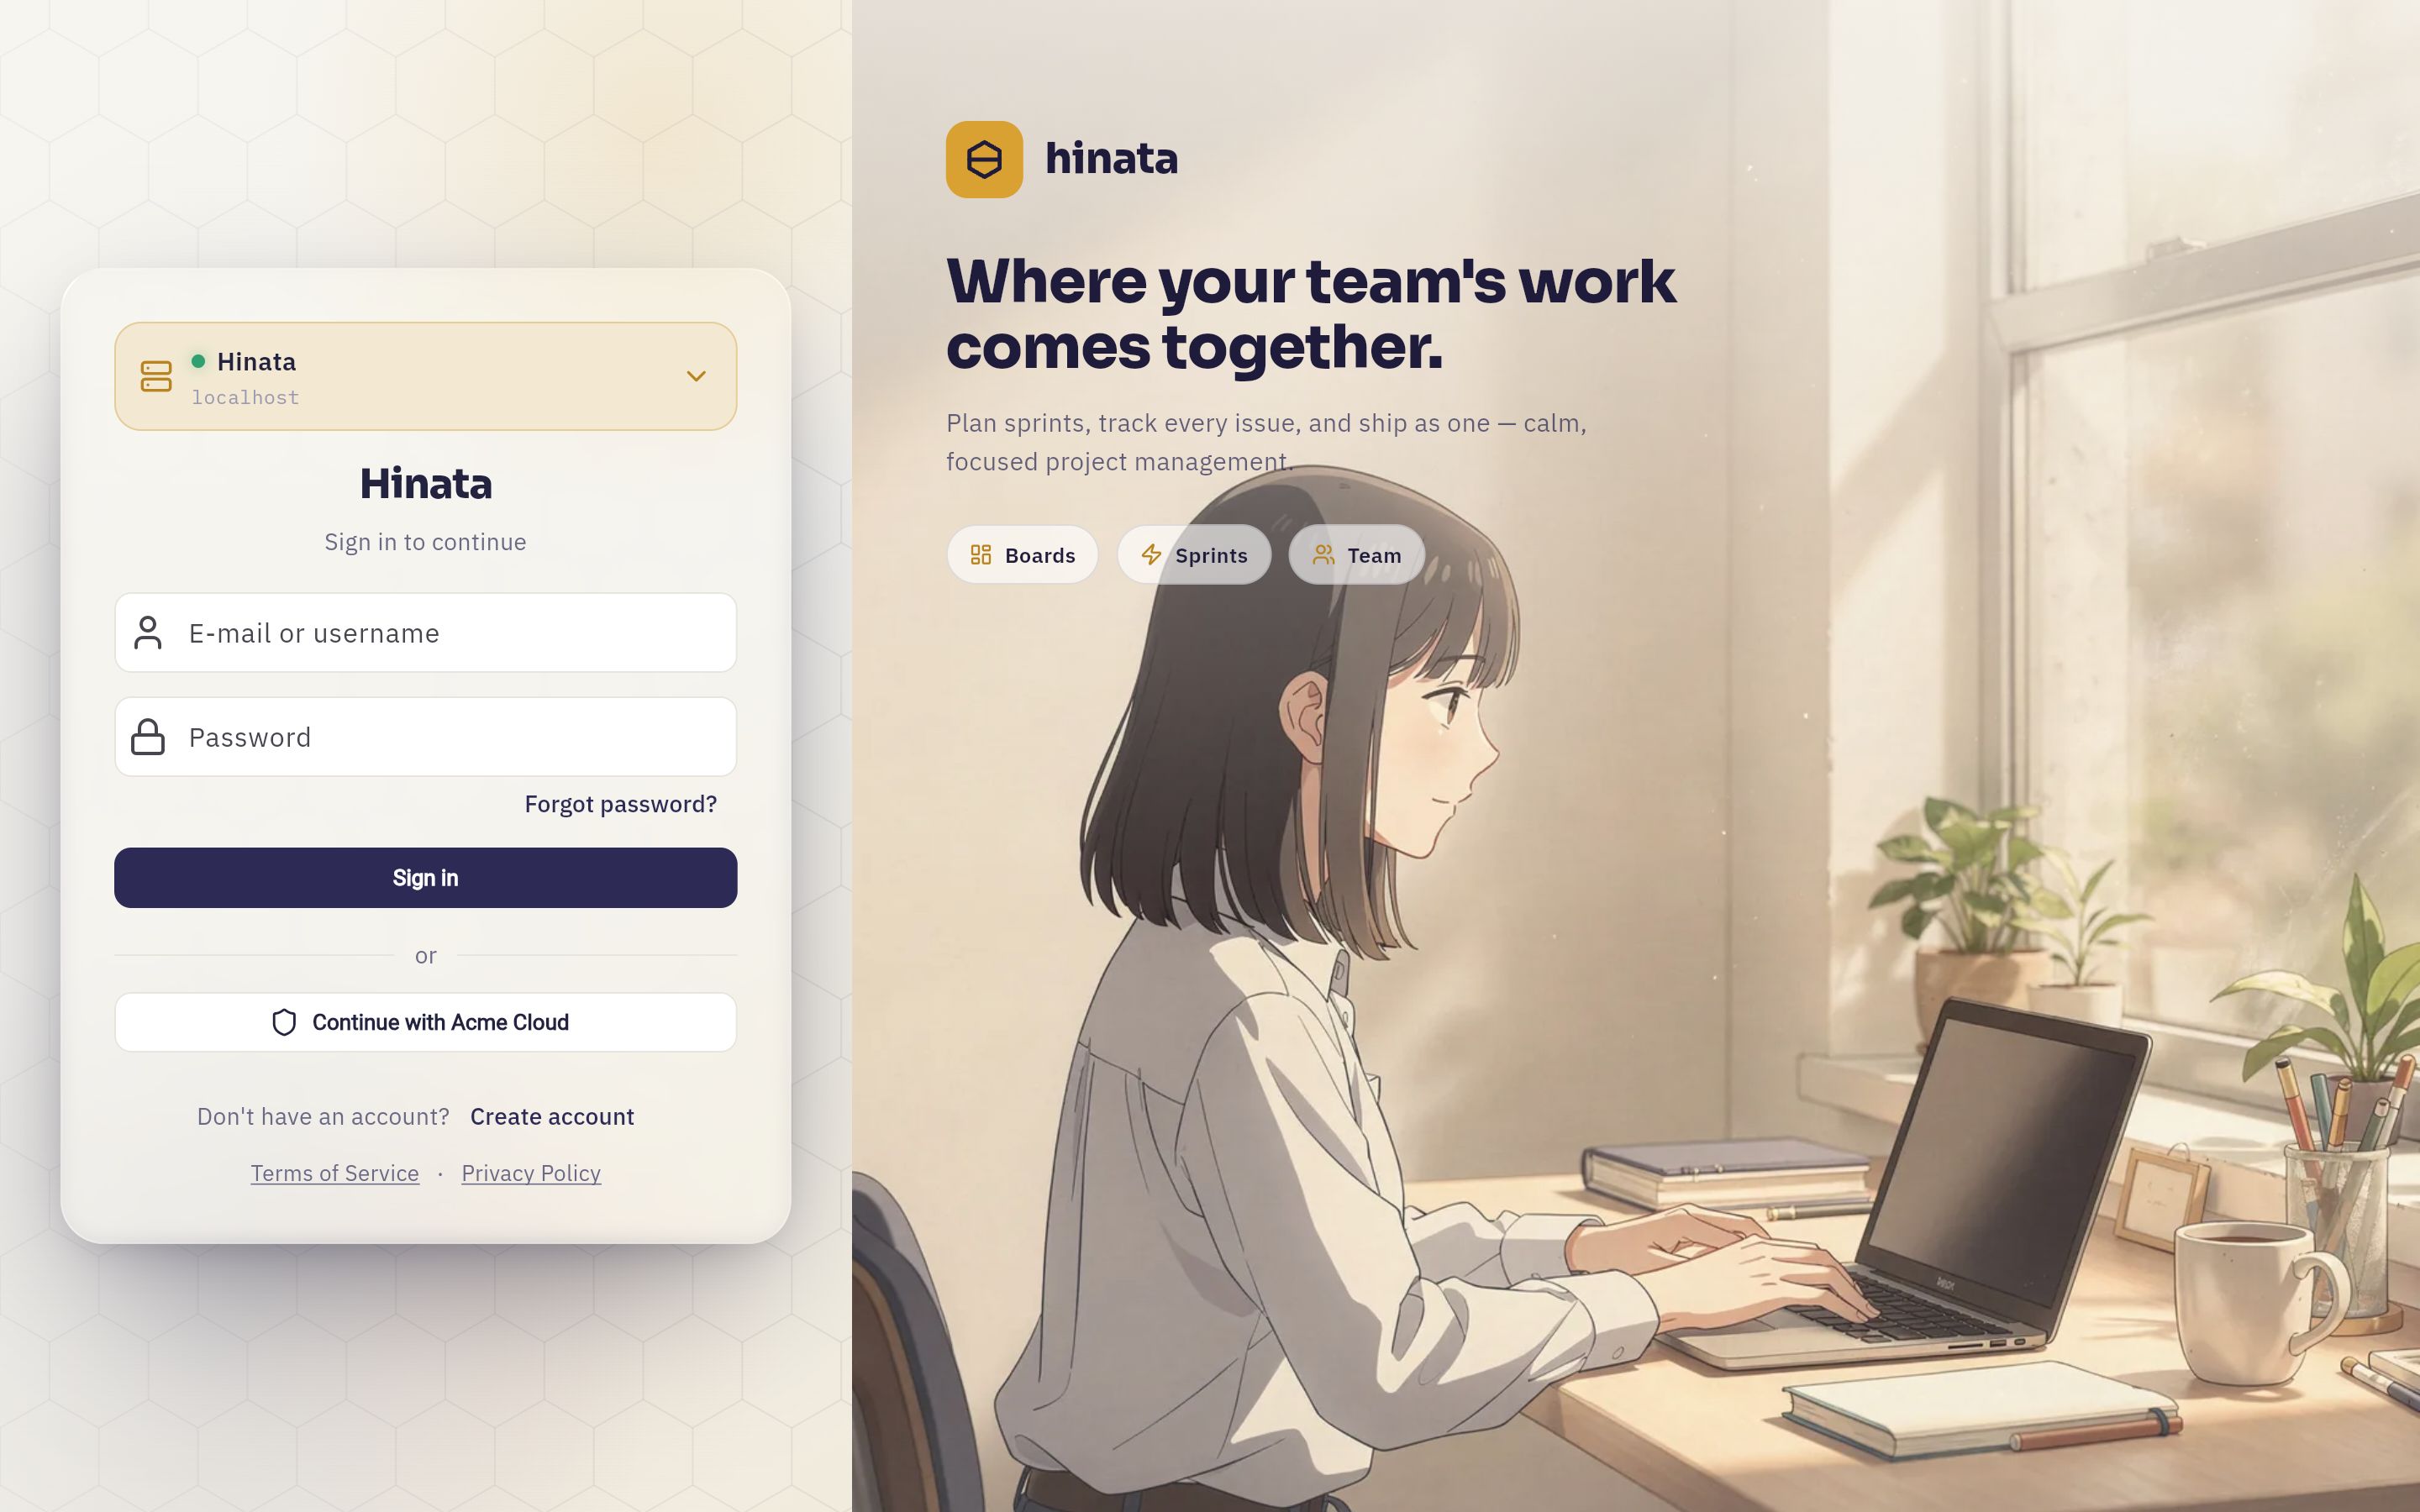 A sign-in screen with everything switched on: E-mail or username, Password, Forgot password?, Sign in, one Continue with … button for the server's single sign-on provider, and Create account under it. The chip at the top of the card names the server you are signing in to, and switches to another one.
With a username and password#
If you fumble the password several times in a row, the server pauses you for a while and says "Too many failed attempts. Please try again later." That's brute-force protection rather than a punishment, and it clears itself after a few minutes.
If two-factor is switched on#
When your account has two-factor authentication enabled, signing in adds one screen: Two-factor authentication, asking for the 6-digit code from your authenticator app.
A recovery code works here too — one of the codes you were told to save when you turned the feature on. Each one works once. Setting this up (and getting new recovery codes) is covered in Your account.
With single sign-on#
Press Continue with …, and your browser opens; you sign in the way you already do everywhere else and land back in Hinata already signed in. The button carries your identity provider's name, so there is nothing to choose.
Some servers turn passwords off entirely and make single sign-on the only way in. When that's the case the sign-in screen says so plainly rather than showing you a password box that cannot work.
If you don't have an account yet#
Some servers let anyone create one with Create account; others only admit people who were invited. When self-registration is switched on you will normally have to confirm your e-mail address before you can sign in, and on stricter servers an administrator has to approve you as well.
Either way, the invitation or verification e-mail contains a link. Open that link on the device you want to use Hinata on and it takes you straight into the app.
If you forgot your password#
Forgot password? sends a reset link by e-mail. Same rule: open it on the device you want to use, and it lands you in the app with a fresh password prompt rather than in a browser tab you then have to abandon.
Which of these you get is up to your server
Passwords, self-registration, admin approval and single sign-on are all switches your administrator controls, and they can be changed at any time without anyone reinstalling anything. If something described here isn't on your sign-in screen, it was turned off on purpose. Whoever runs the server can read the details under Authentication and Single sign-on.
The tour#
The first time the app connects to a server it plays a short walk-through: a welcome slide, then three cards covering Projects, Sprints and Teams.
It runs before you sign in, so it really is only a tour — nothing you tap in it touches your workspace. Swipe or press Continue to move through, Skip in the top corner to jump to the end, and Get Started to finish.
You see it once per device. If you'd like it again, well — that's what this handbook is for.
A tour of your workspace#
Once you're signed in you land on Home, your dashboard. Here is the whole thing on a desktop screen:
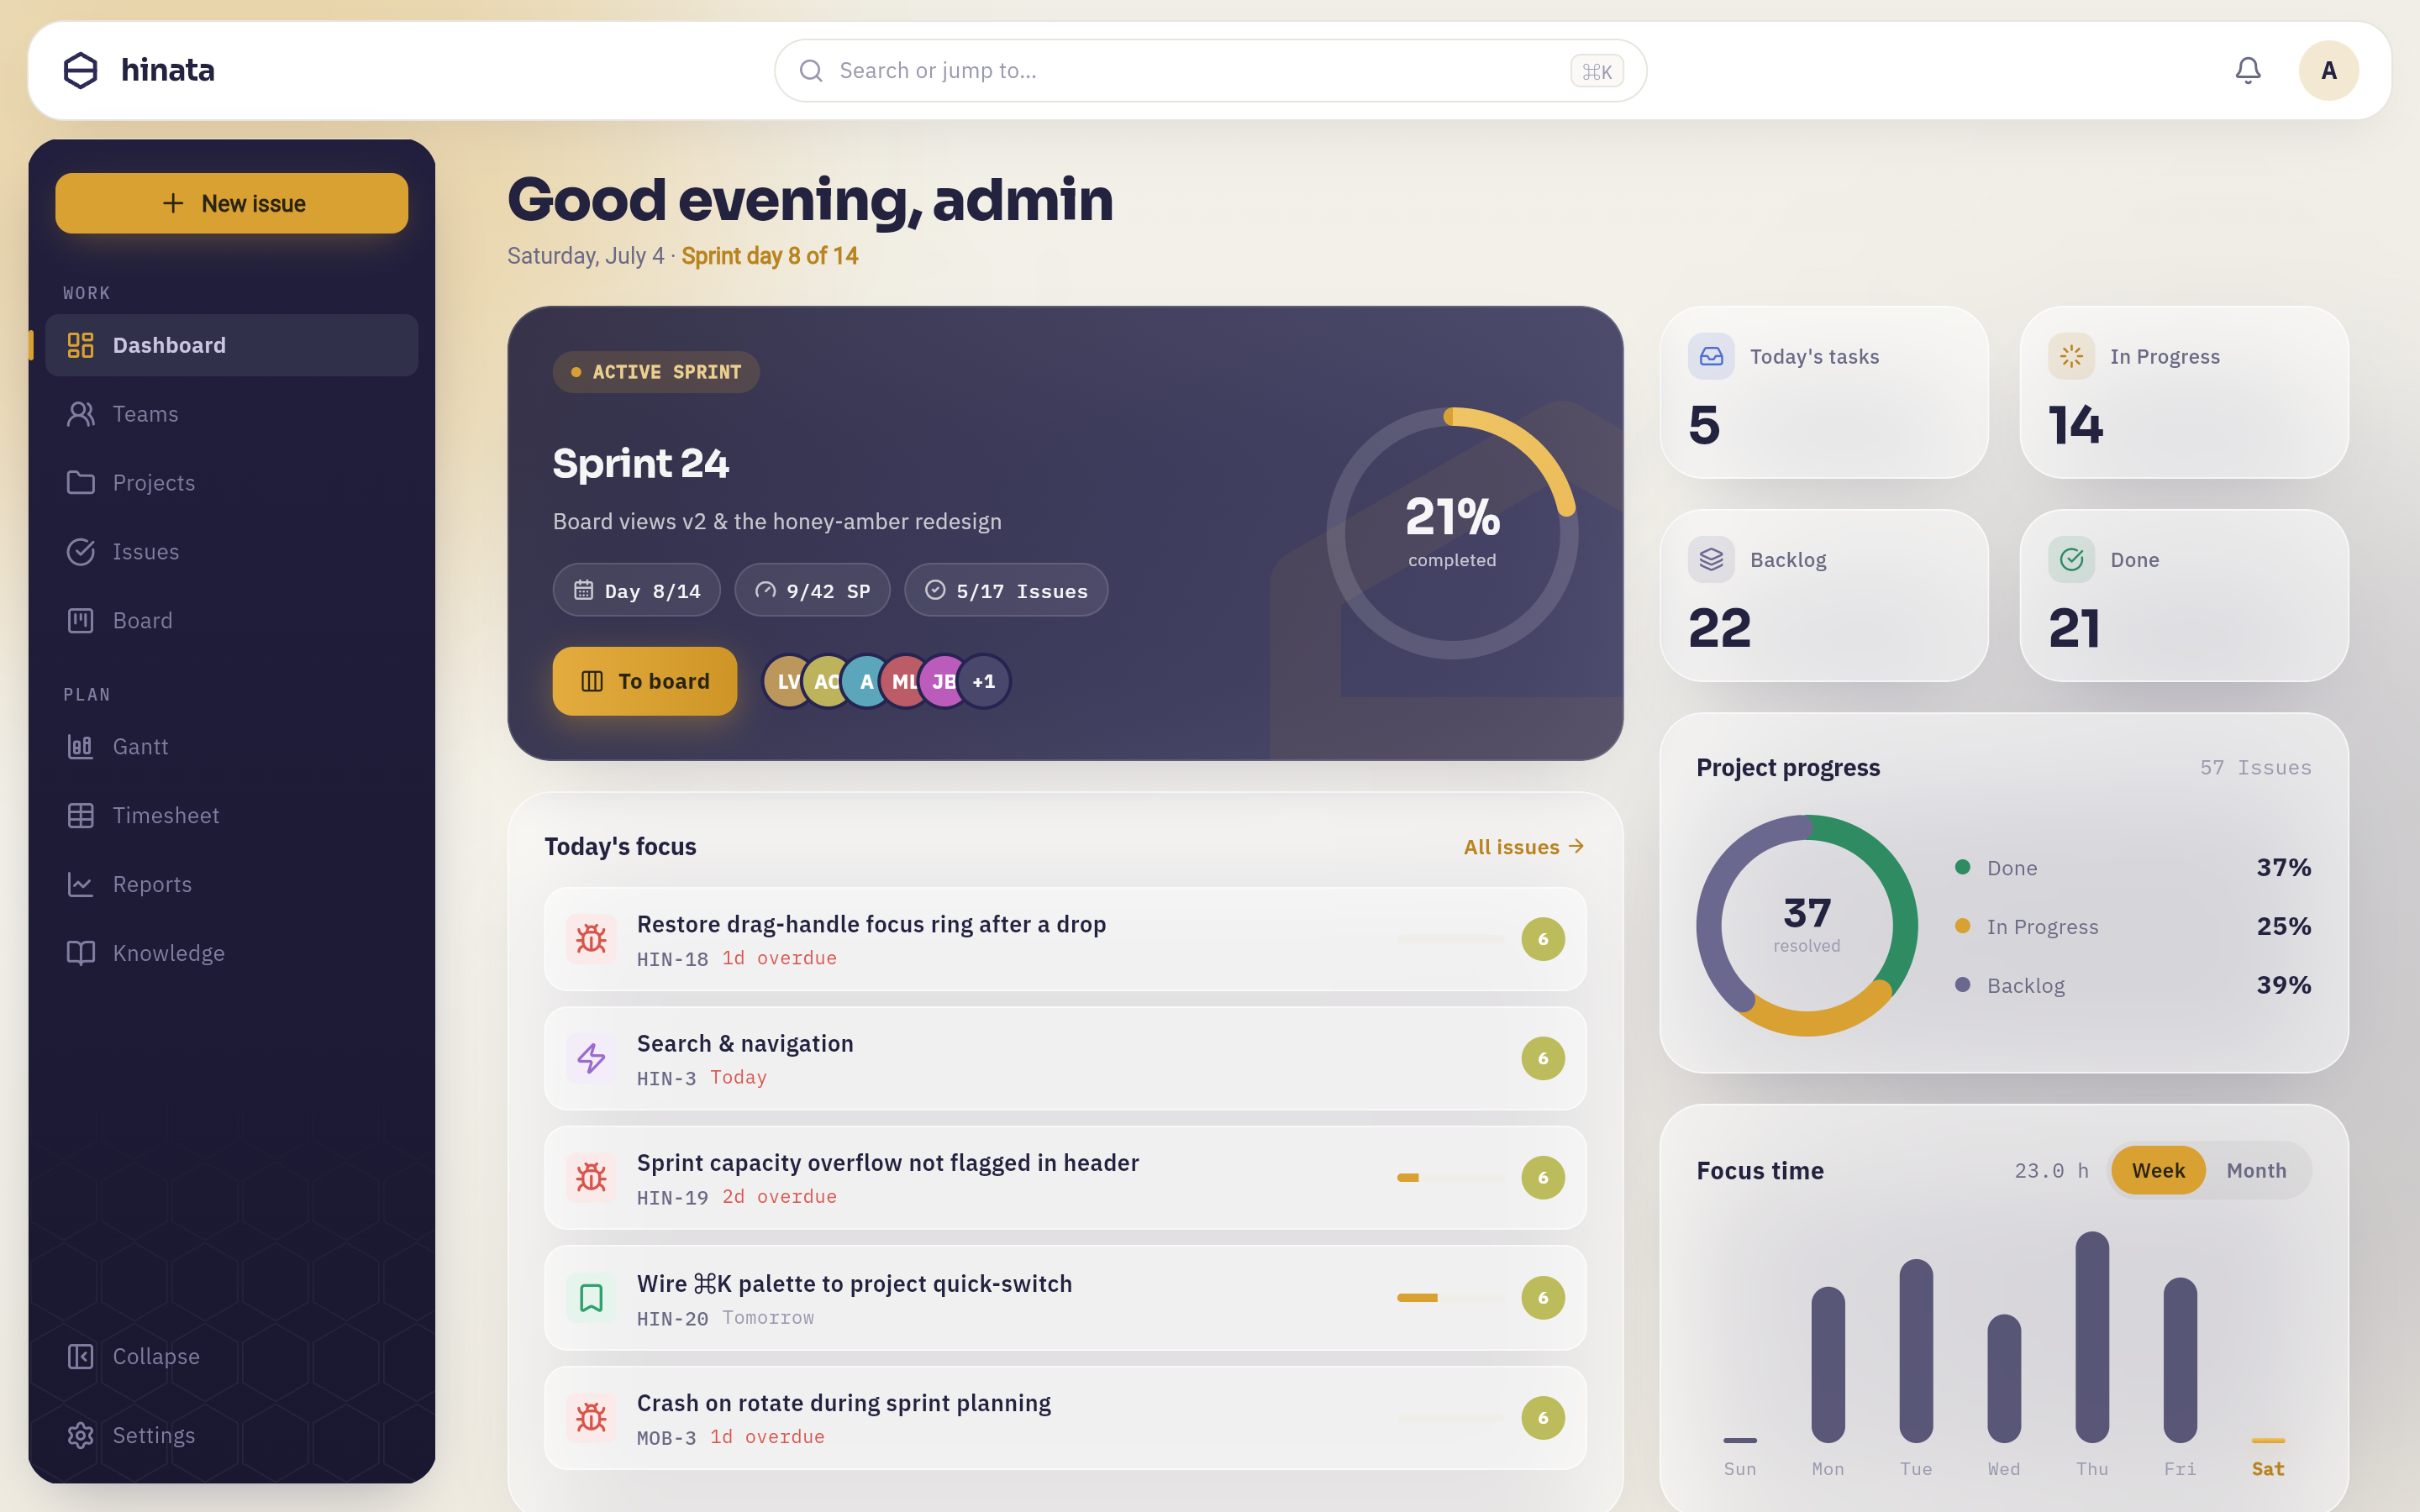 Home on a desktop. The navy navigation rail runs down the left with the amber New issue button at the top; the active sprint card and today's focus list fill the middle; key figures, project progress and focus time stack down the right.
The navigation rail#
The dark rail on the left is how you get everywhere. Right at the top sits the amber New issue button — the control you'll press most often, deliberately placed where you cannot miss it. Below it the destinations are split into two groups.
Work is what you touch every day:
| Entry | What it's for |
|---|---|
| Home | Your dashboard: today's focus, the active sprint, progress and time. |
| Teams | The groups you belong to, and which projects each one opens up. |
| Projects | Every project you can see, with its key, members and workflow. |
| Issues | The full, filterable list of issues across the projects you can see. |
| Board | The agile board — columns, swimlanes, drag and drop. |
Plan is what you reach for when you step back from the day:
| Entry | What it's for |
|---|---|
| Watched | Issues you asked to be kept informed about. |
| Gantt | The timeline: dates, dependencies, milestones and the critical path. |
| Timesheet | Your week of logged work, hour by hour. |
| Reports | Burndown, velocity, cycle time and distributions. |
| Knowledge | The knowledge base — articles, notes, documentation. |
At the bottom, Collapse shrinks the rail to icons only when you want the screen space back — the icons stay in the same order, so your muscle memory survives — and Settings opens your account.
Learn one shortcut, and make it this one
⌘K on macOS, Ctrl+K everywhere else, from anywhere in the app. It opens the search palette, which finds issues, projects, people, boards and articles, accepts an issue key like HIN-42 directly, and runs commands — including Create new issue and Toggle light / dark appearance. More in Finding things.
The top bar#
The bar across the top carries three things:
- The hinata wordmark on the left. On a server that has been branded, this is where your organization's name and logo appear instead.
- The search field in the middle, showing the ⌘K hint. Clicking it opens the same palette as the shortcut.
- The bell and your avatar on the right. The bell wears a dot when something is waiting for you; your avatar opens your account.
Your dashboard#
Home exists to answer one question: what should I be doing today? Reading it from the top:
- The greeting knows the time of day and greets you by name. Underneath it sits today's date and, when a sprint is running, which day of it you're on — "Sprint day 14 of 14" is a gentle way of saying the sprint ends today.
- The hero card is that active sprint: its name, its goal, how far along it is as a percentage ring, the day, the story points and the issue count. To board jumps straight to the work, and the row of faces is who's on it. With no sprint running, the card invites you to plan one instead.
- Today's focus is the short list of issues that actually want you today — type icon, title, issue key, and how overdue it is in red. All issues opens the full list.
- The key figures — Today's tasks, In Progress, Backlog, Done — are counts you can act on rather than decoration.
- Project progress splits everything you can see into Done, In Progress and Backlog as a ring with percentages.
- Focus time charts the hours you have logged, by Week or by Month.
- Team ranking compares resolved work across the last 30 days, once your workspace has enough of it to be worth comparing.
Make the dashboard yours#
Customize, at the top right, turns the dashboard into an editor.
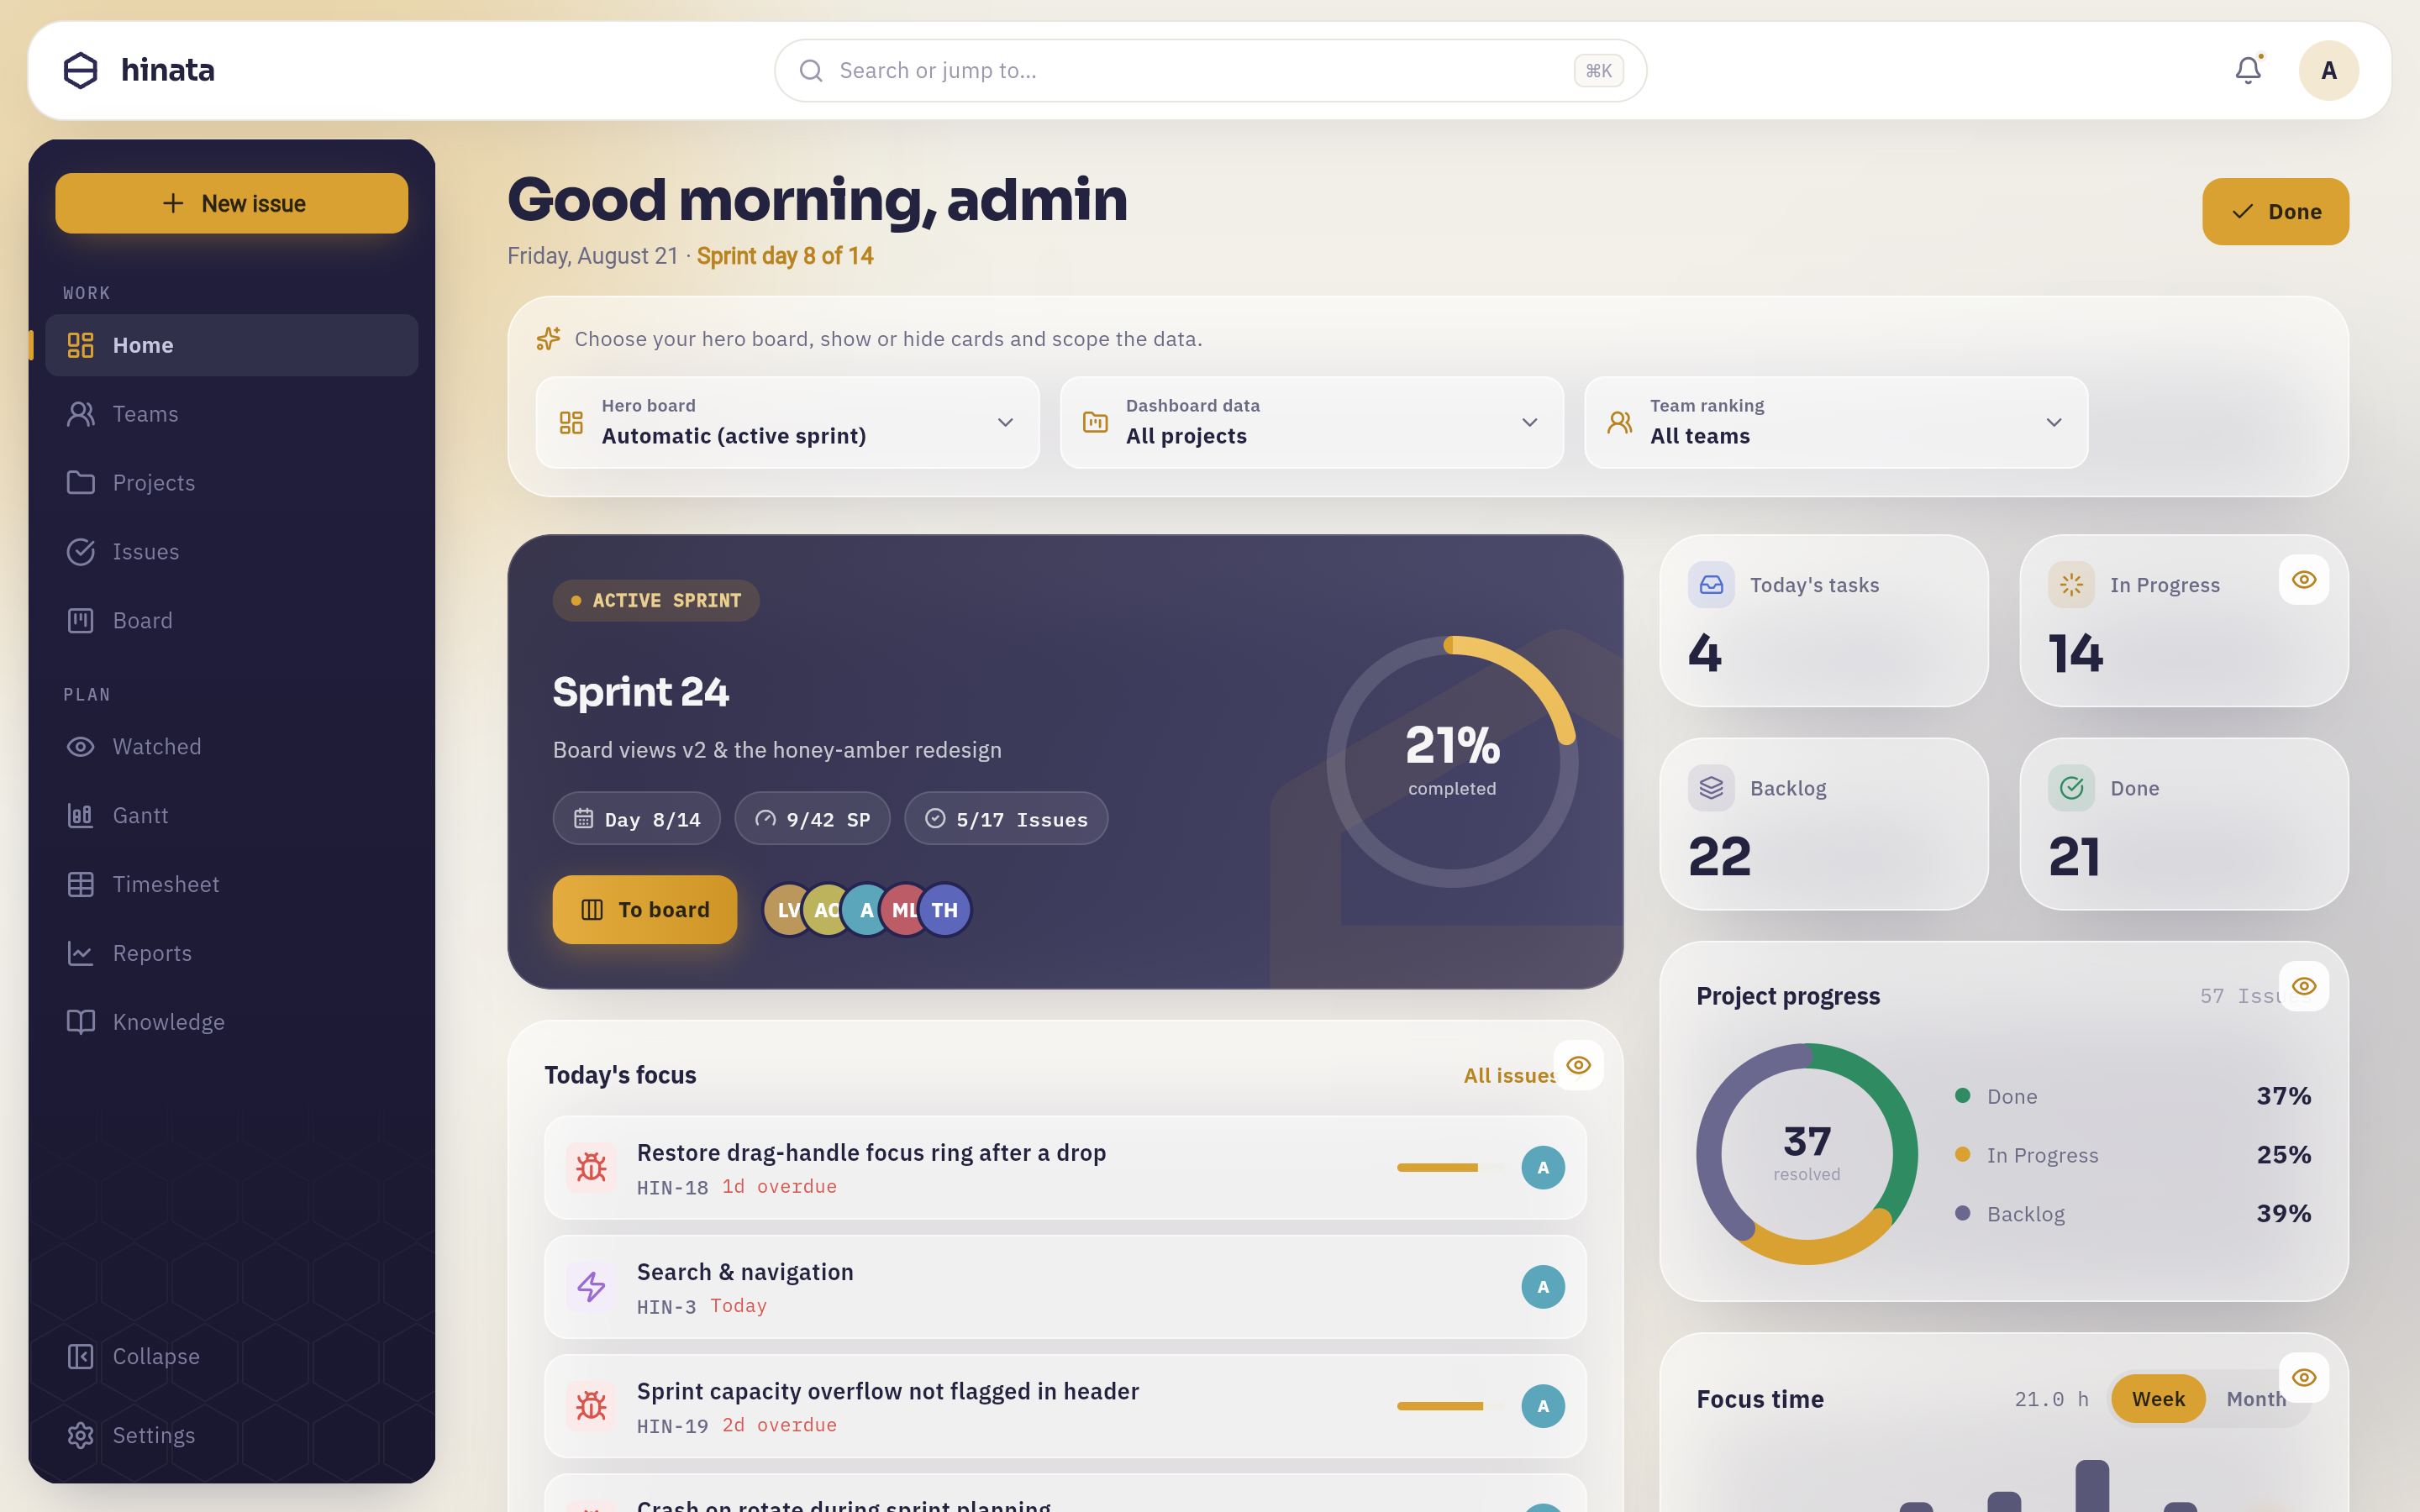 Edit mode: three scope pickers appear above the cards — Hero board on Automatic (active sprint), Dashboard data on All projects, Team ranking on All teams — every card grows an eye that hides it, and Customize has become Done.
Left on Automatic, the hero card follows whichever sprint is running; point it at a board instead and it stays there. The two scope pickers narrow the numbers to particular projects or teams rather than everything you can see, which starts to matter the moment you belong to more than two or three things. And a card that isn't how your team works — team ranking is the usual one — can simply go.
Press Done when you're happy. The layout is saved to your account rather than to the device, so it is waiting for you on your phone too.
On a phone, or in a narrow window#
The same app, rearranged rather than reduced.
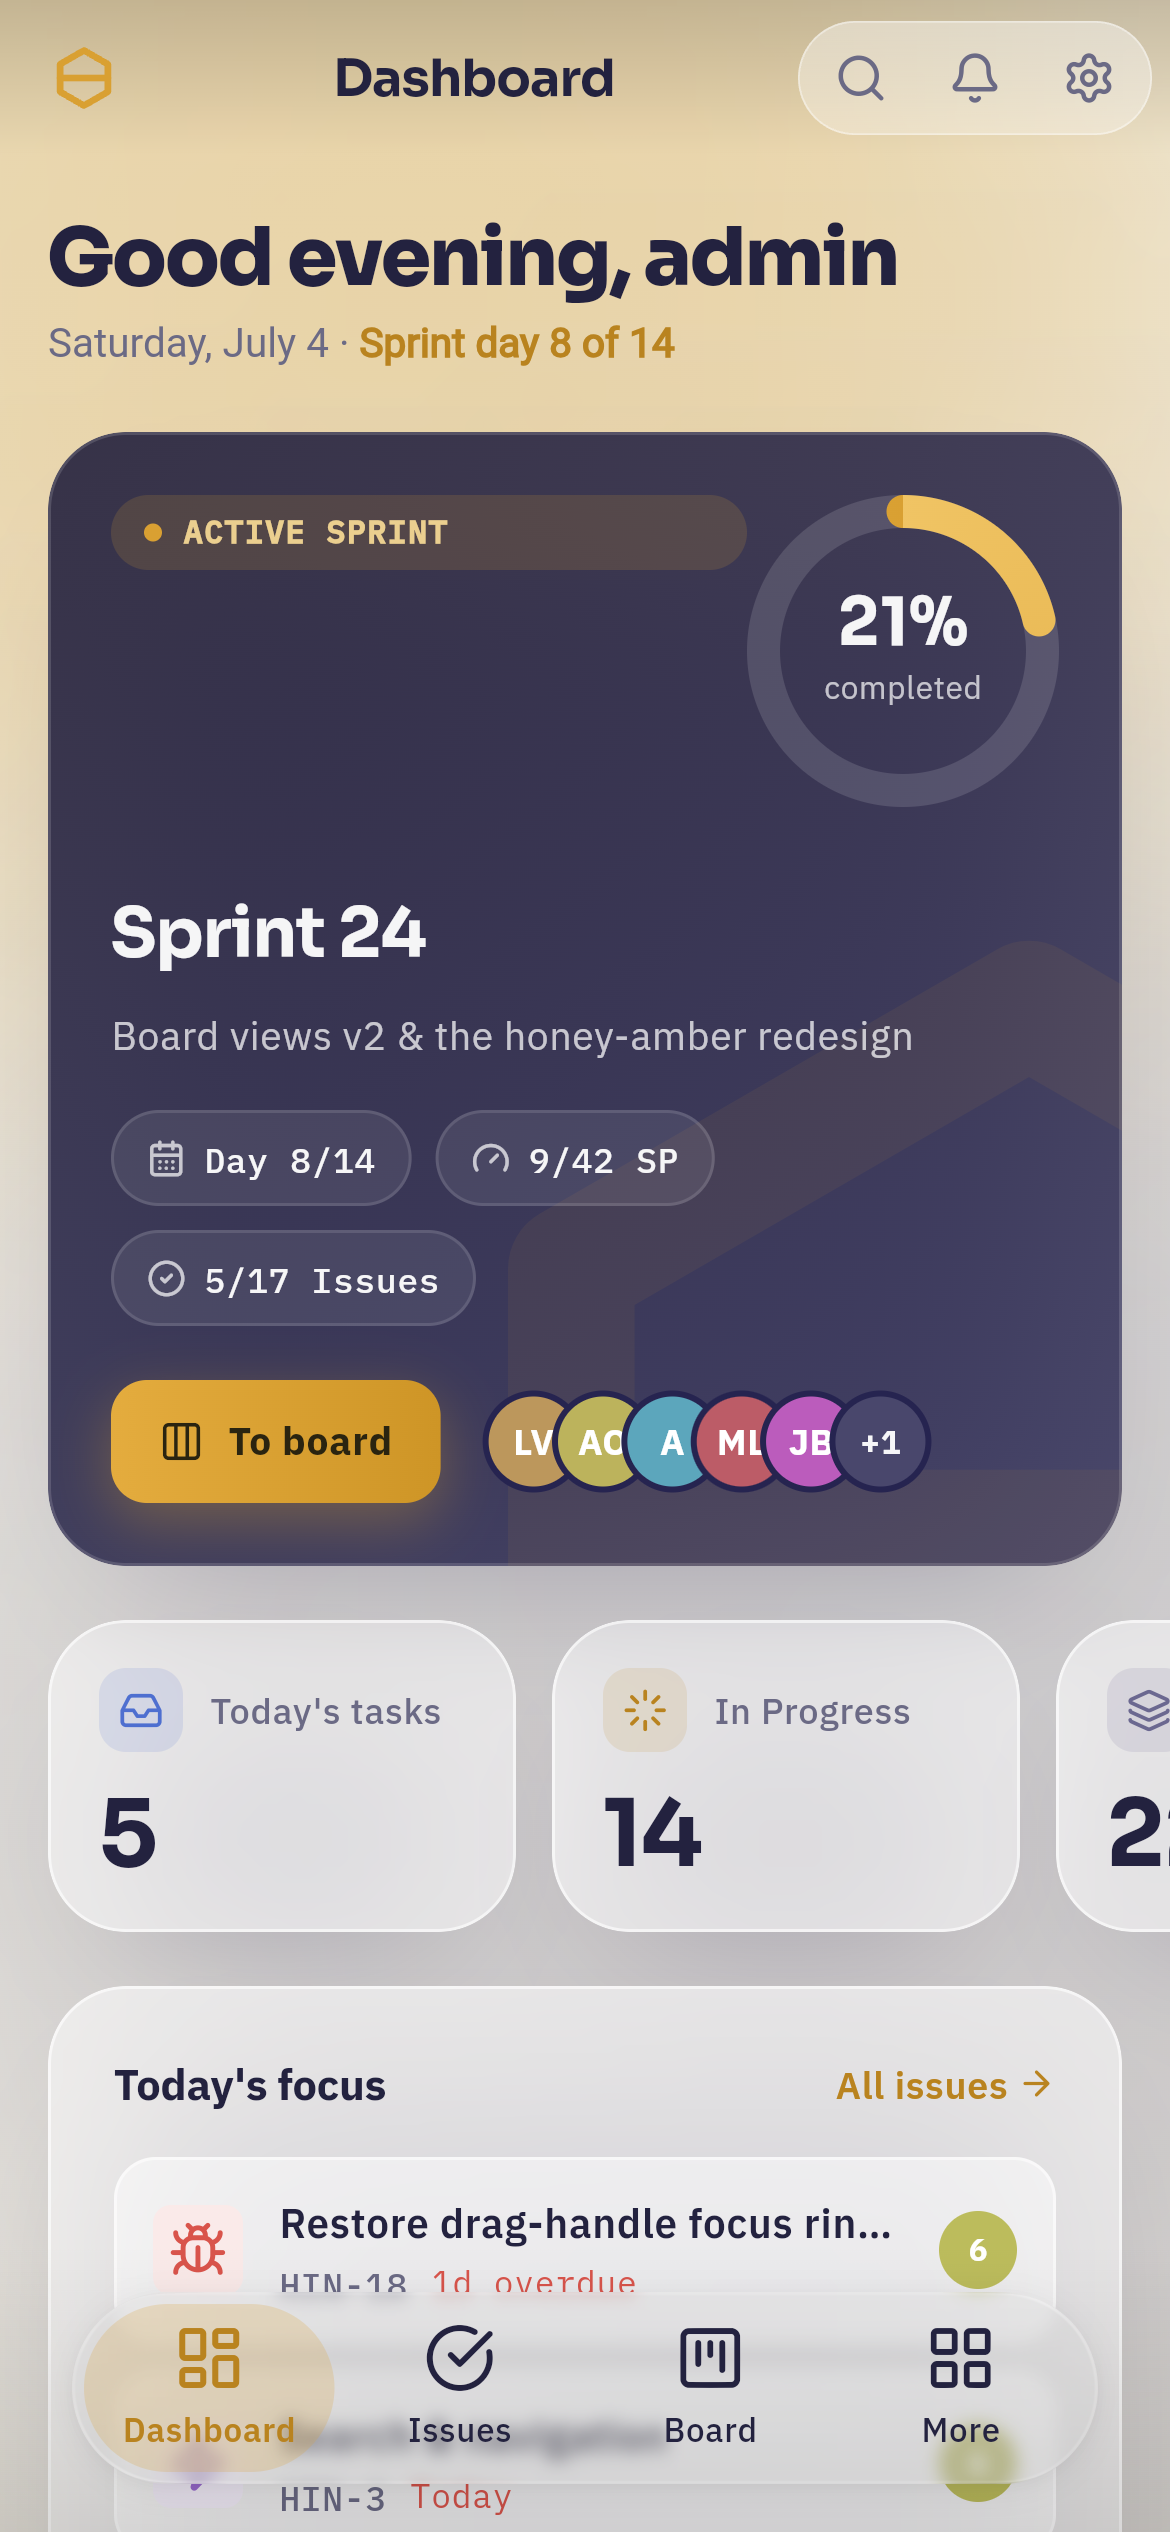 The same Home screen on a phone: sprint card, key figures and today's focus, with the floating glass tab bar — Home, Issues, Board, More — and its detached search button at the bottom.
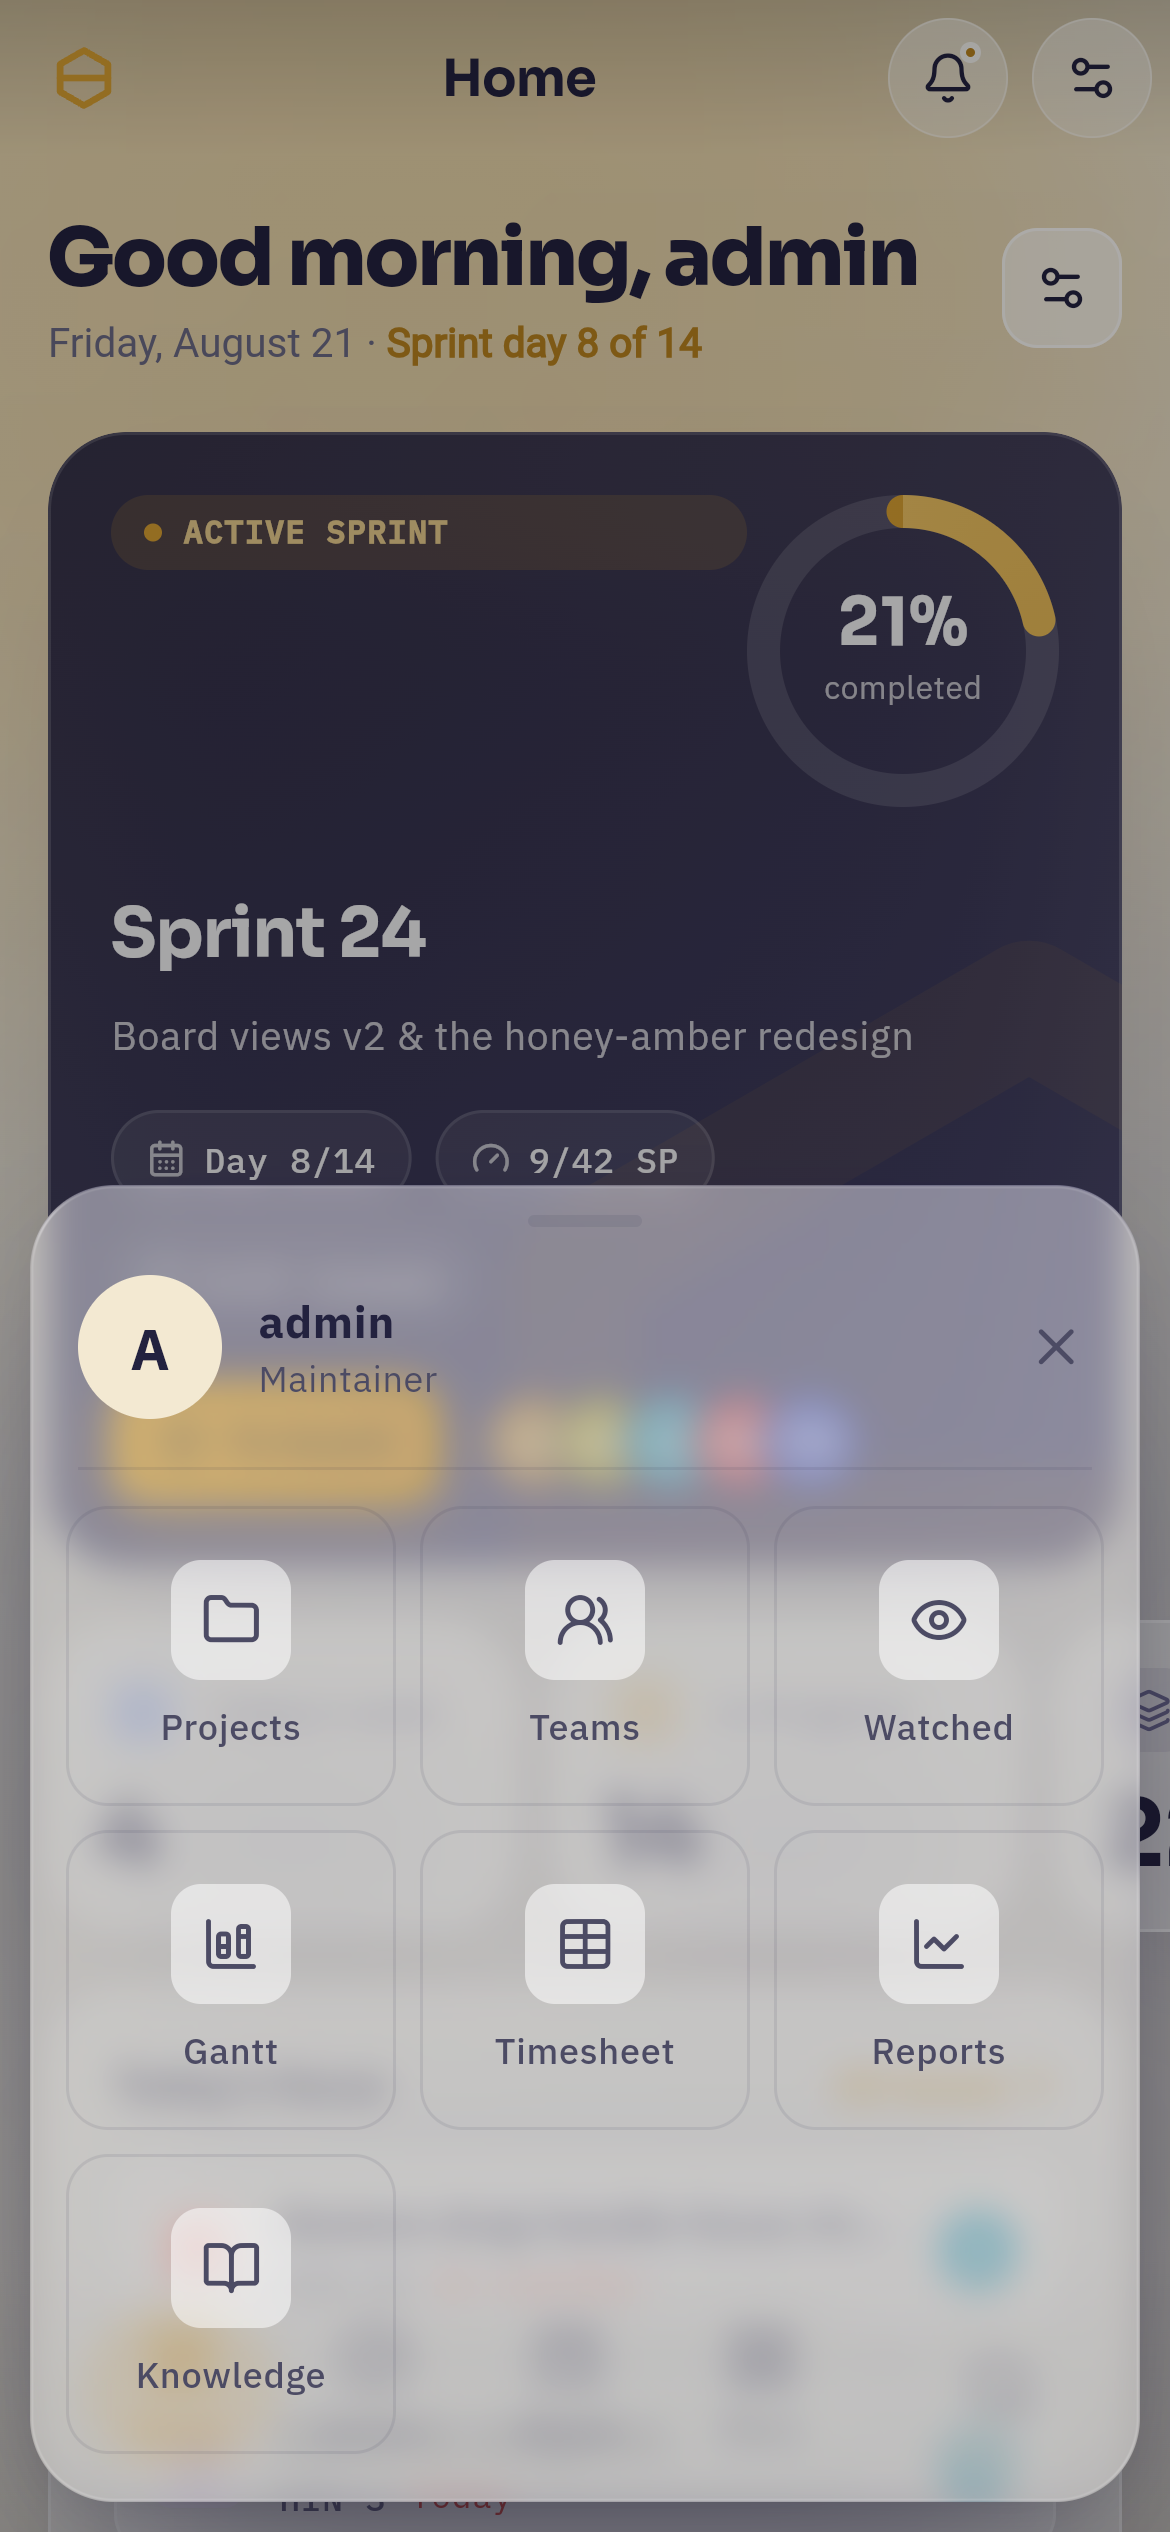 More opens a sheet over the page: your account at the top, then the whole Plan group as tiles — Projects, Teams, Watched, Gantt, Timesheet, Reports, Knowledge.
Nothing is missing on the phone; it is the same screens and the same data, laid out for a thumb. On your phone covers the differences that do exist.
Light, dark, and your language#
Open Settings at the bottom of the rail and look for the Appearance & app card.
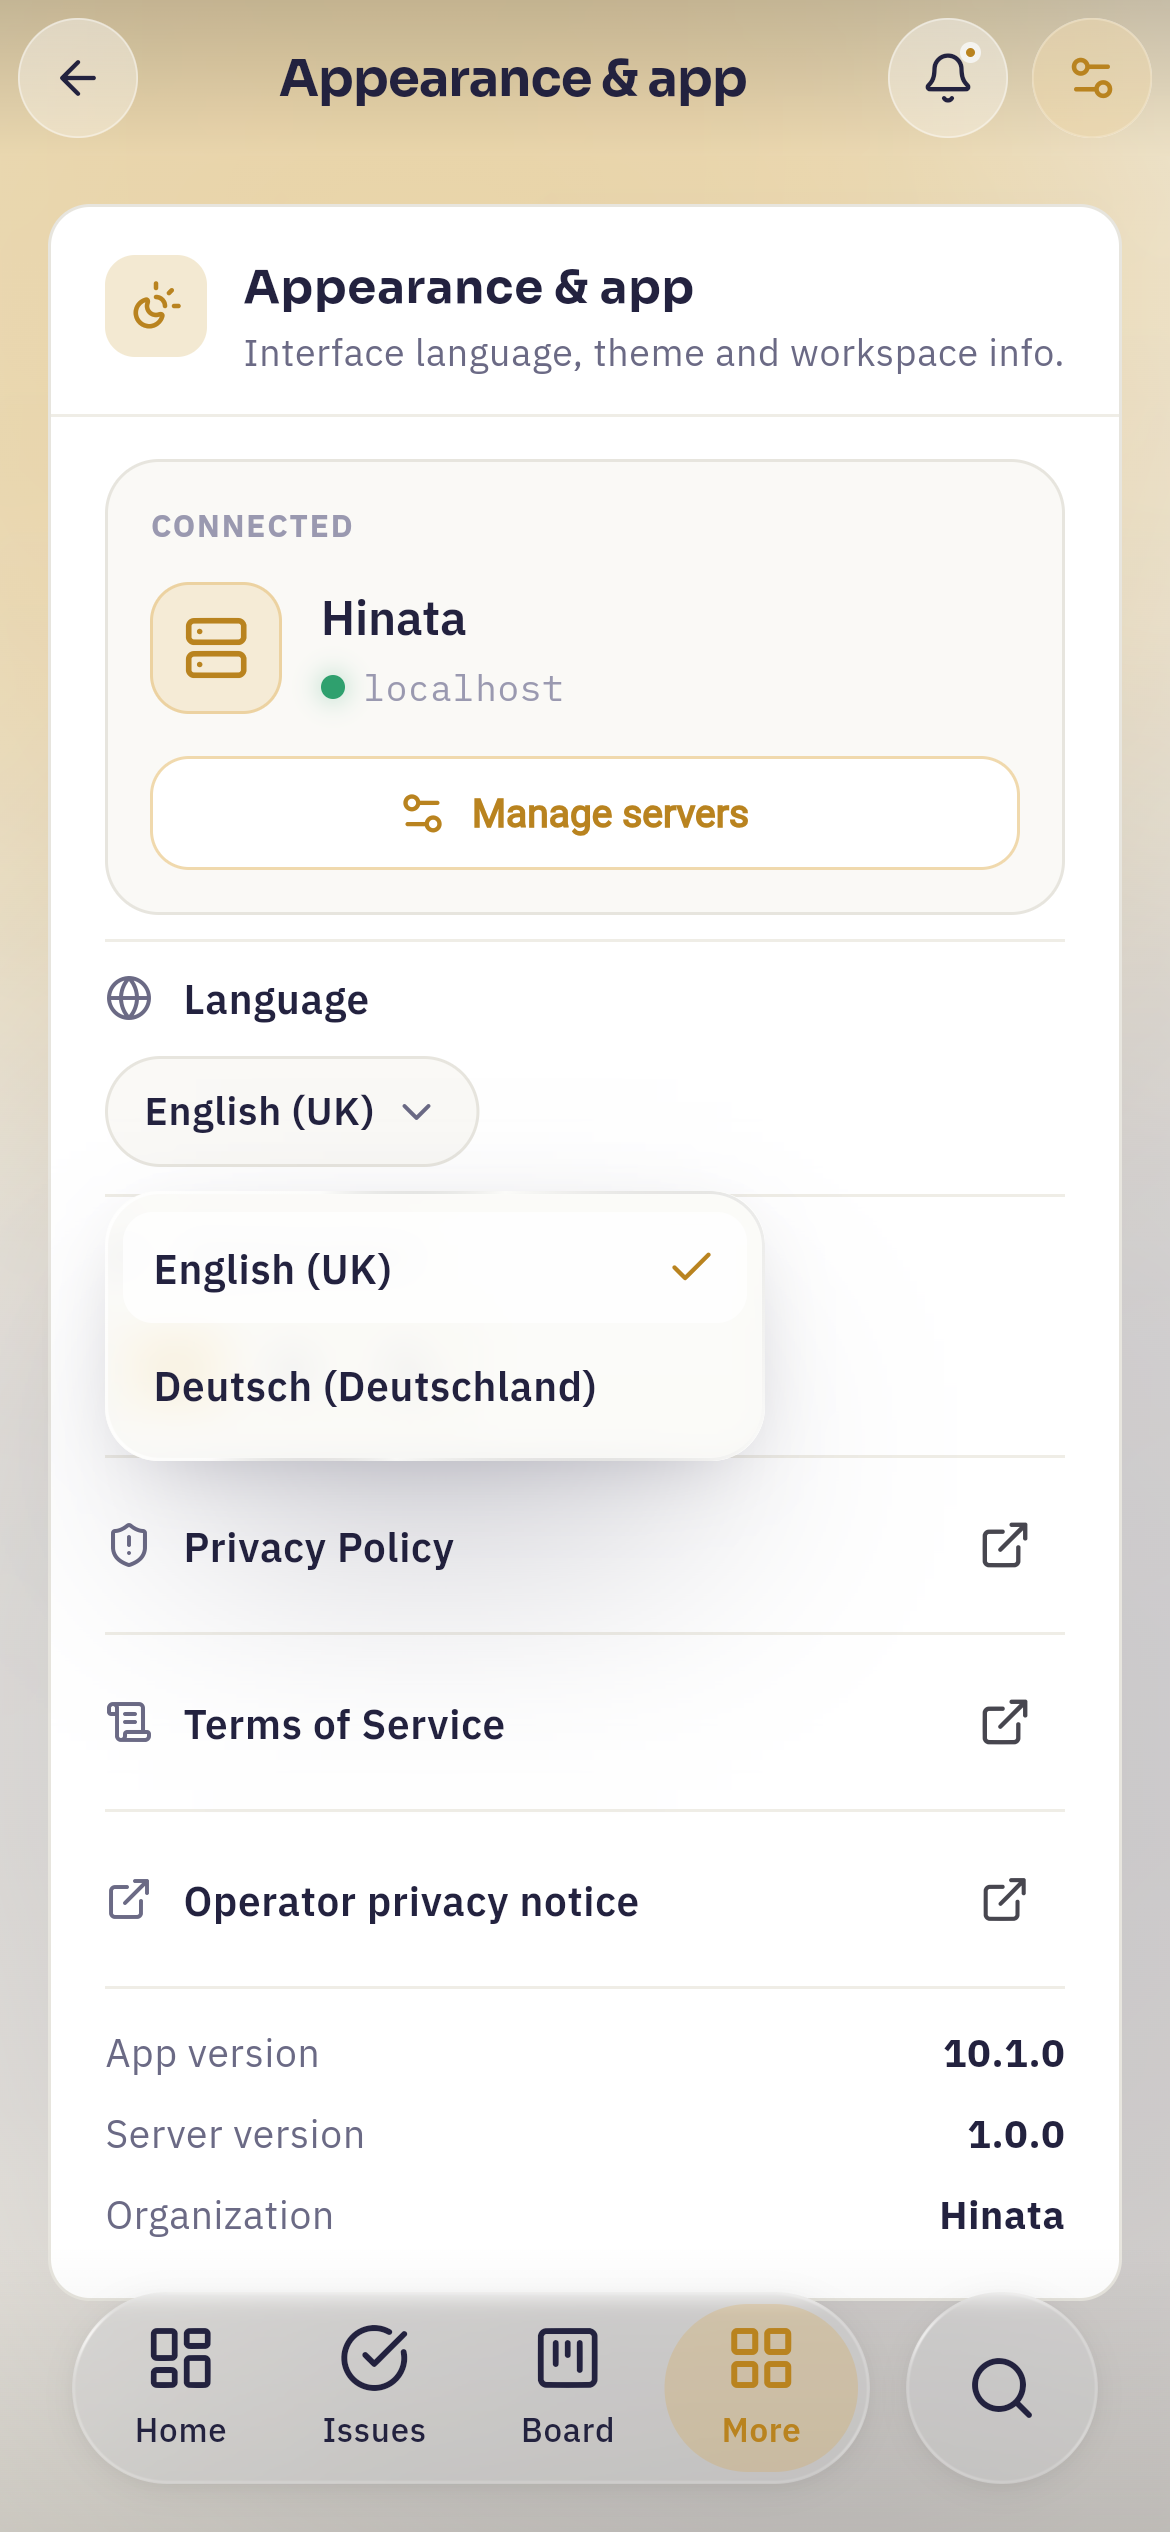 The Appearance & app card on a phone, with the language picker open: two entries, and a tick on the one in use. Above it the card names the server this app is connected to and carries Manage servers.
Your very first launch picks whichever language matches your device, and after that your choice sticks. It travels with every request to the server too, so messages and errors that come from the server arrive in your language.
Appearance, under the language row, is three buttons: follow the system, always light, always dark. The honey-amber accent is deliberately the same colour in both, so nothing shifts hue when the sun goes down. If you'd rather not open Settings at all, the ⌘K palette has Toggle light / dark appearance as a command.
The rest of the Settings page — your profile, e-mail address, password, two-factor, active sessions and your data — is covered in Your account.
Your first five minutes#
If you want something concrete to do right now, do these in order. Each one takes under a minute and teaches you a part of the app you'll use daily.
- Open Projects and see what you have access to. If the list is shorter than you expected, that's normal — Projects & teams explains why.
- Click a project card. It opens that project's issue list.
- Open any issue. Read the description, the activity, the comments. This is where most of your time will go.
- Press ⌘K and type an issue key —
HIN-1, or whatever your project's prefix is. Watch it jump straight there. - Press New issue and create something small and real. You can always archive it afterwards.
- Go back to Home and see your new issue counted in the figures.
The same account, every device#
Hinata is one app compiled for Android, iPhone and iPad, the web, macOS, Windows and Linux. Same account, same data, everywhere.
Changes travel live: mark something done on your laptop and it is done on your phone before you have put the laptop down, because the app holds an open connection to the server instead of checking every so often. You'll see comments, attachments and board moves from other people appear the same way, without refreshing anything.
Signing in on a new device does not sign you out anywhere else. Settings → Active sessions lists every device that currently holds a sign-in, marks the one you're on, and lets you end any of the others — the right thing to do when a phone goes missing.
When your app looks different from this page#
A handful of things genuinely depend on how your server was set up, and it is worth knowing which, so you don't hunt for a button that was never there:
- How you sign in — passwords, single sign-on, or only one of the two.
- Whether you can register yourself, and whether an administrator has to approve you.
- Whether push notifications reach your device. In-app and e-mail notifications always work; push depends on the server being connected to a push relay, and is not available on Linux at all.
- Whether e-mail turns into issues. Some servers watch a mailbox and file incoming mail as issues automatically.
- Attachment size and type limits, which your operator sets.
- Your organization's name and logo, which come from the server rather than the app.
None of these are settings you can change yourself. If one of them is in your way, the person who runs the server is the person to ask.
Where to go next#
You're in, and you can find your way around. From here, follow whichever of these matches what you actually need to do:
- Projects & teams — what a project is, what that
HIN-42prefix means, and why you can see some projects and not others. Start here; nearly everything else assumes it. - Working with issues — creating one, filling it in well, and moving it through its life.
- Boards & sprints — the board, the backlog, and planning work in cycles.
- Timeline & dependencies — dates, ordering and what blocks what.
- Tracking your time — logging work and filling in your timesheet.
- Comments & attachments — talking about work in the place the work lives.
- Finding things — the palette, filters, and finding that one issue from March.
- Writing documentation — the knowledge base, and when to use it instead of an issue.
- Reports & dashboard — what the charts mean and which ones to trust.
- Staying informed — notifications, watching, and the weekly summary.
- Your account — profile, password, two-factor, sessions and your data.
- On your phone — what changes on a small screen, and what doesn't.
Nothing here is unrecoverable by accident
Issues are archived rather than deleted by default, projects can be archived instead of removed, and the genuinely destructive actions make you type a name before they proceed. Explore. You'll be fine.